Showing posts with label Mel. Show all posts

Monday, 25 September 2017

Experiments in creating organic shapes from particle motion and curves

  1. Particle set up for testing
SETUP_NPARTICAL_MOVE

2. Turn these particles into curves. There are two ways to do this.

The first way involves expressions which allow the curves to be draw in real time. 3D Splanchnic has a tutorial showing what to put where. Watch it HERE.
code for expressions:
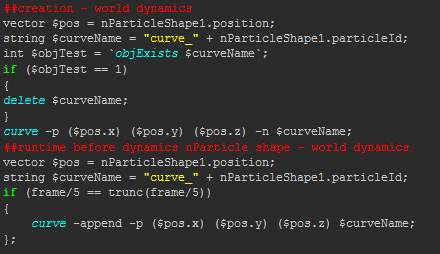
mel_Parts_to_curve
(update: if ( frame%10 == 0)  is simpler)
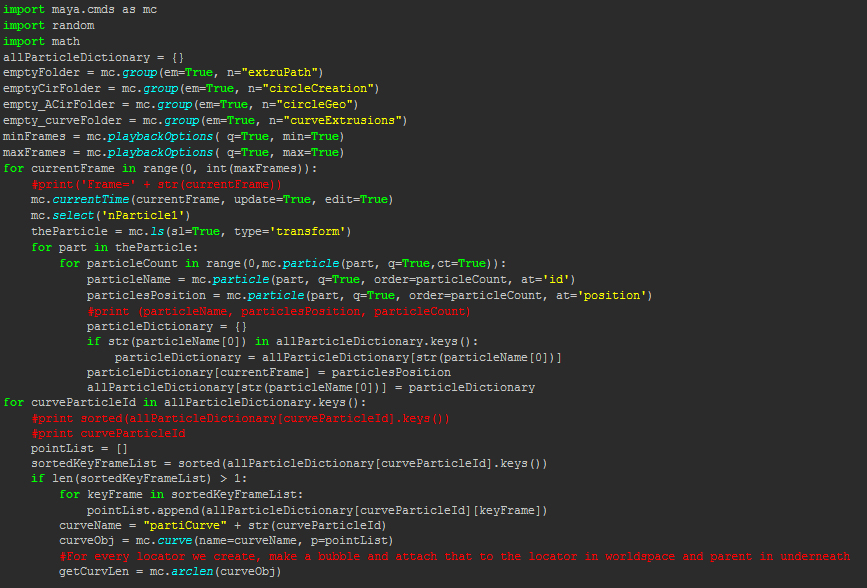
The second is a script. Bryan Woodward’s 'ParticletoTube' Script for Maya makes tubes out of particles by first creating curves. The first part of the script loops through the timeline frames for "theParticle" and then uses a nested loop to capture each "particlesPosition" and draws each curve form the "pointList". Read about the script HERE:.

Code:
partsToCurvesScript

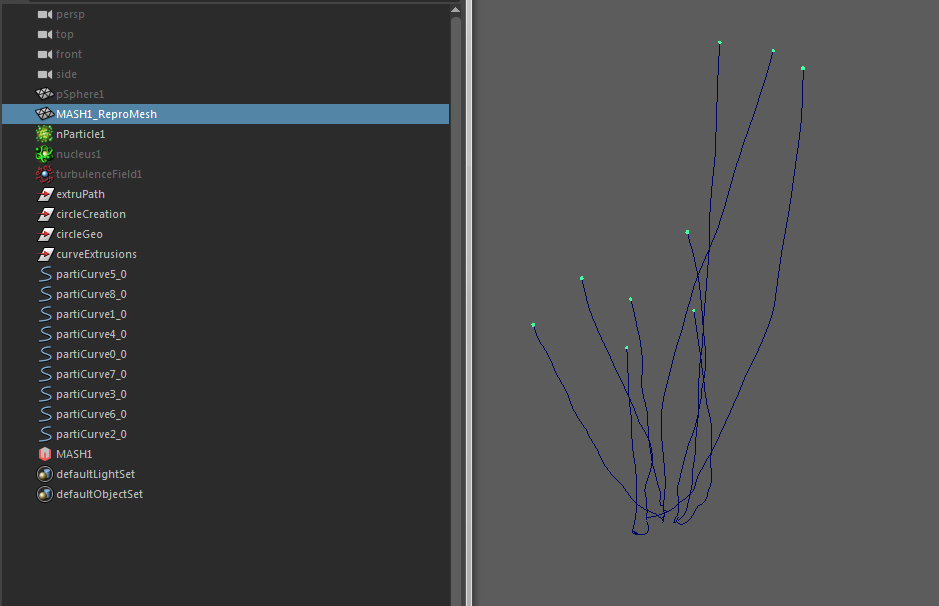
Now curves can be generated from the particle positions:

CurvesFromParticles02

nParticles_plus_mash.jpg

3. Finally a script is needed to turn these curves into organic looking geometry. Andrew Tubelli has a nice script for doing just that. Download it from his site HERE. The code simplifies what would be an annoying task by adding a UI with a few friendly sliders:
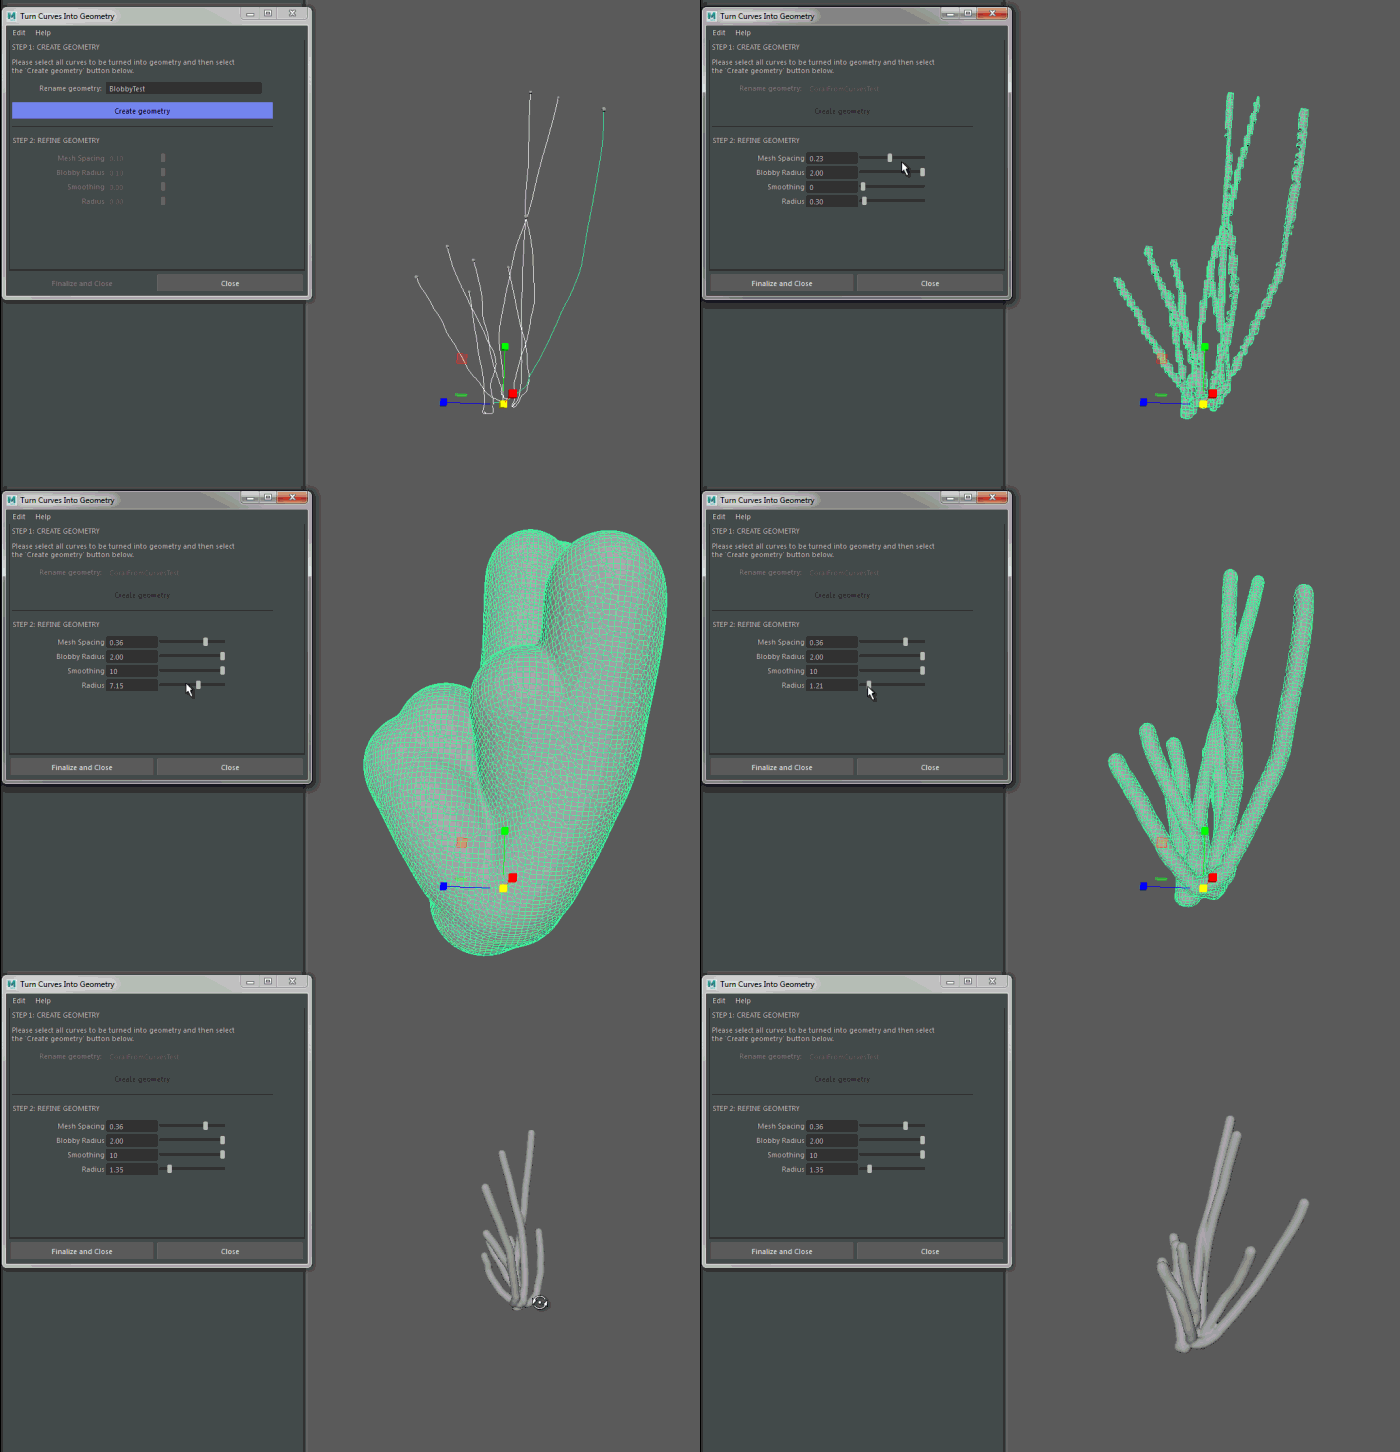
coral2

Completing the process via the Maya UI instead of the script:
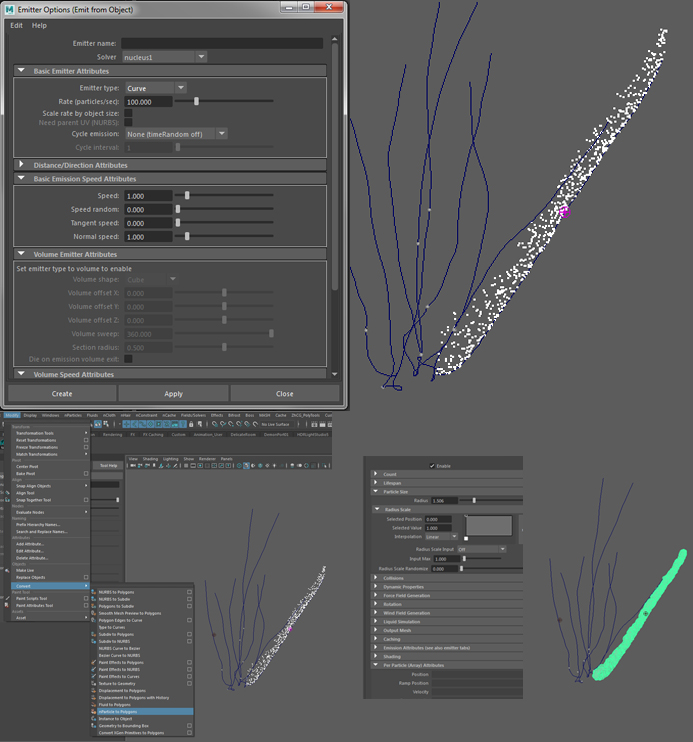
nParticles_to_poly_old_way

The code rebuilds the curves based on "arcLen", creates nParticles for the curves and evaluates a mel command to create polygons with the ability to set attributes Via a UI.
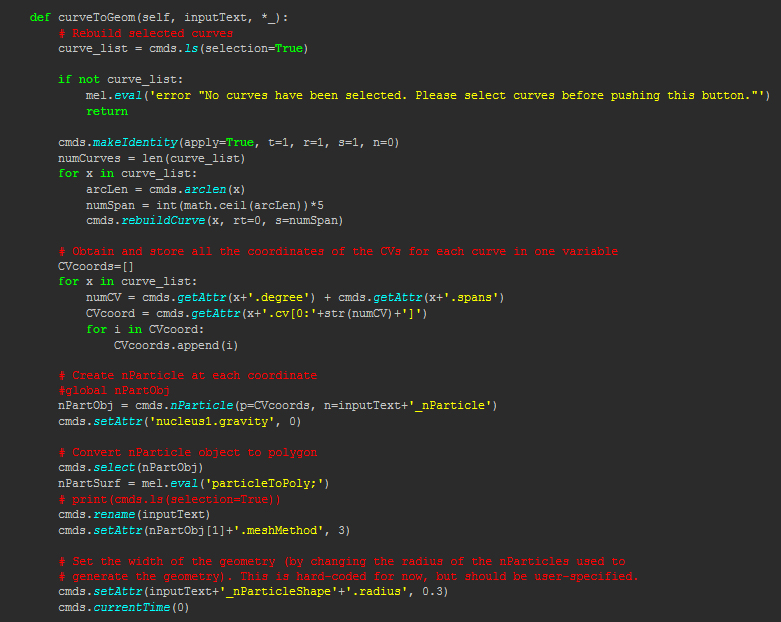

curveToGeoScript
Note: Some variable Changes are occasionally needed. For example the  curves generated by particles can be excessive - Try changing the (arcLen)*5 to say (arcLen)/5 or adding it into the UI.
I also needed to up the '.maxTriangleResolution' count.

Example:


4. A few shapes generated by moving a  passive collider around so as to alter the particle motion..
 
5. Now an experiment just from wires. I used a skull I previously modeled to draw curves on and then turned the curves into geometry.


Preiew render experiment
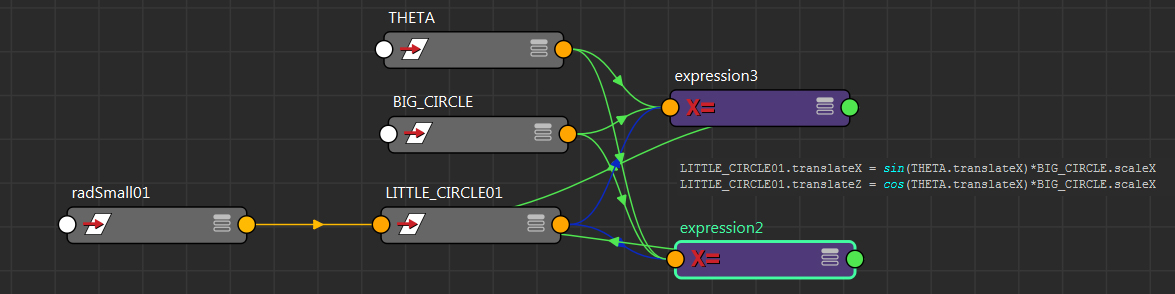
Some paint effect brushes added:
Sunday, 24 September 2017

Notes - Nodes & Mash – Maya

Here are some learning notes on creating a  plug-in for Maya, creating relationships with expressions and Maya's new python node. These are notes for me but perhaps others may stumble upon them and find them to be of interest. I'll probably change and grow this page as I learn a little more.
  1. Notes and links on how to create a Maya plug-in
Autodesk have an example Python Math Node. Here are my notes:
  • API module: import maya.openMaya
  • Proxy class access: import maya.openMayaMPx
  • Access to math module: import math
  • Variable for node name:  kPluginNodeTypeName = "nodeNameNode"
  • ID number for Node:        nodeNameNodeId = OpenMaya.MTypeId(0x00001)
  • Define subclass of existing class: class nodeName(OpenMayaMPx.MPxNode)
  • input = OpenMaya.MObject()
  • output = OpenMaya.MObject()
  • Override constructor using base: OpenMayaMPx.MPxNode.__init__(self)
  • plug = current input: def compute(self,plug,dataBlock):
  • Compute math example: result = math.sin( inputFloat )
  • Recompute plug and flag as clean: dataBlock.setClean( plug )
  • Maya pointer: return OpenMayaMPx.asMPxPtr( sineNode() )
  • Initialize method - input and output: nodeInitializer():
  • Add attribute here (ex- frequency or or amplitude): input = nAttr.create( "input", "in", ####)
  • Causes compute method to re-calculate - sets relationship: sineNode.attributeAffects( sineNode.input, sineNode.output )
  • Plug-in registration - Node Name/ID/Create Method/Initialize Method/Node Type: mplugin.registerNode( kPluginNodeTypeName, sineNodeId, nodeCreator, nodeInitializer )
  • De-register plug-in: mplugin.deregisterNode( sineNodeId)
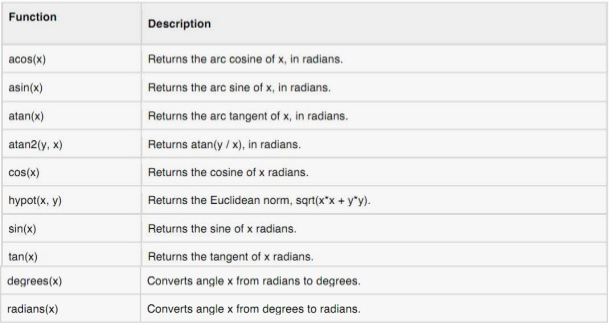
Understanding this we can now turn these python math functions into Maya nodes:
programming-with-python.jpg
2. Some links to various resources:
Classes:
  • Wrappers - math classes - m -(Quaternion, matrix, vector, points, vectors etc)
  • MObjects - data encapsulation (meshes, skin clustter nodes, curves  etc).
  • Functions Sets - mfn  - (access and manipulate data)
  • Proxy Class - mpx - - (abstractions - create new object types - inheritance)
For memory intensive process plug-ins need to be complied in c++. Here are some links:
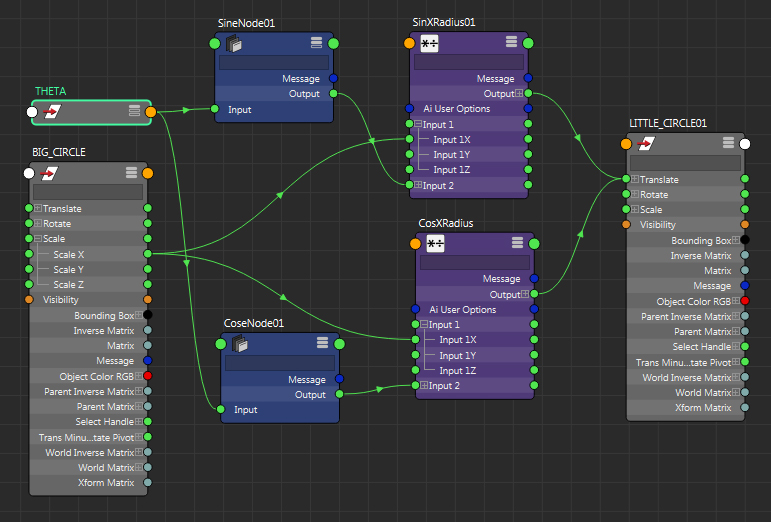
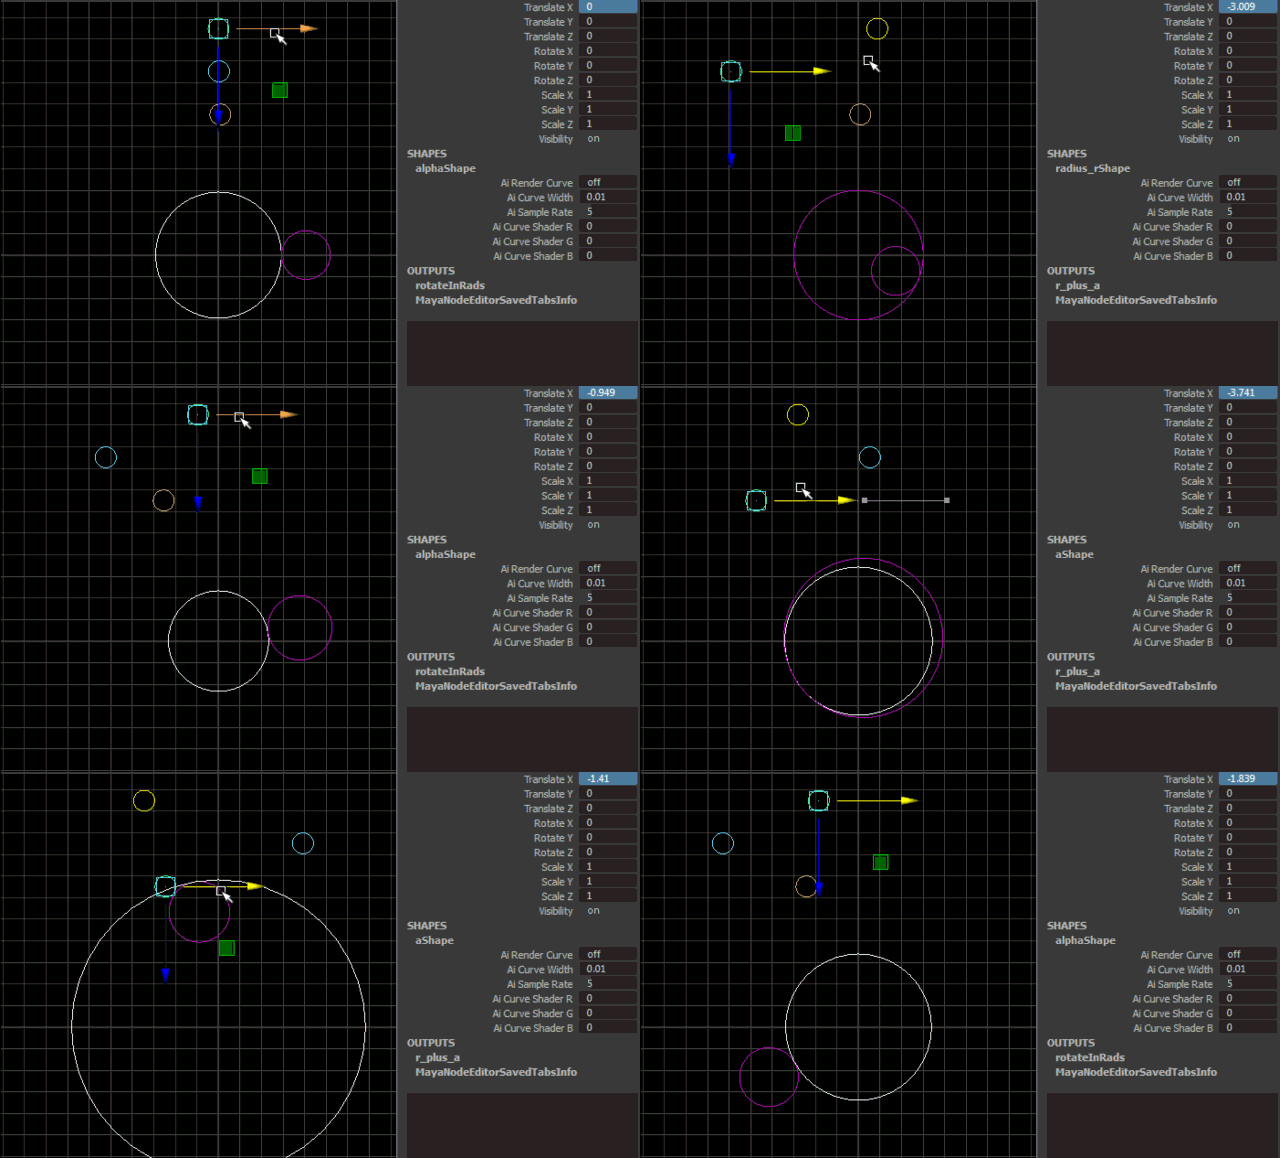
3. Example: Testing cosine node works.
radTimesSinCos01
radCosSonCirclesMayaNodes01
3. A Mel expression that does the exact same thing. A little bit less work :)
radTimesSinCos01_expression
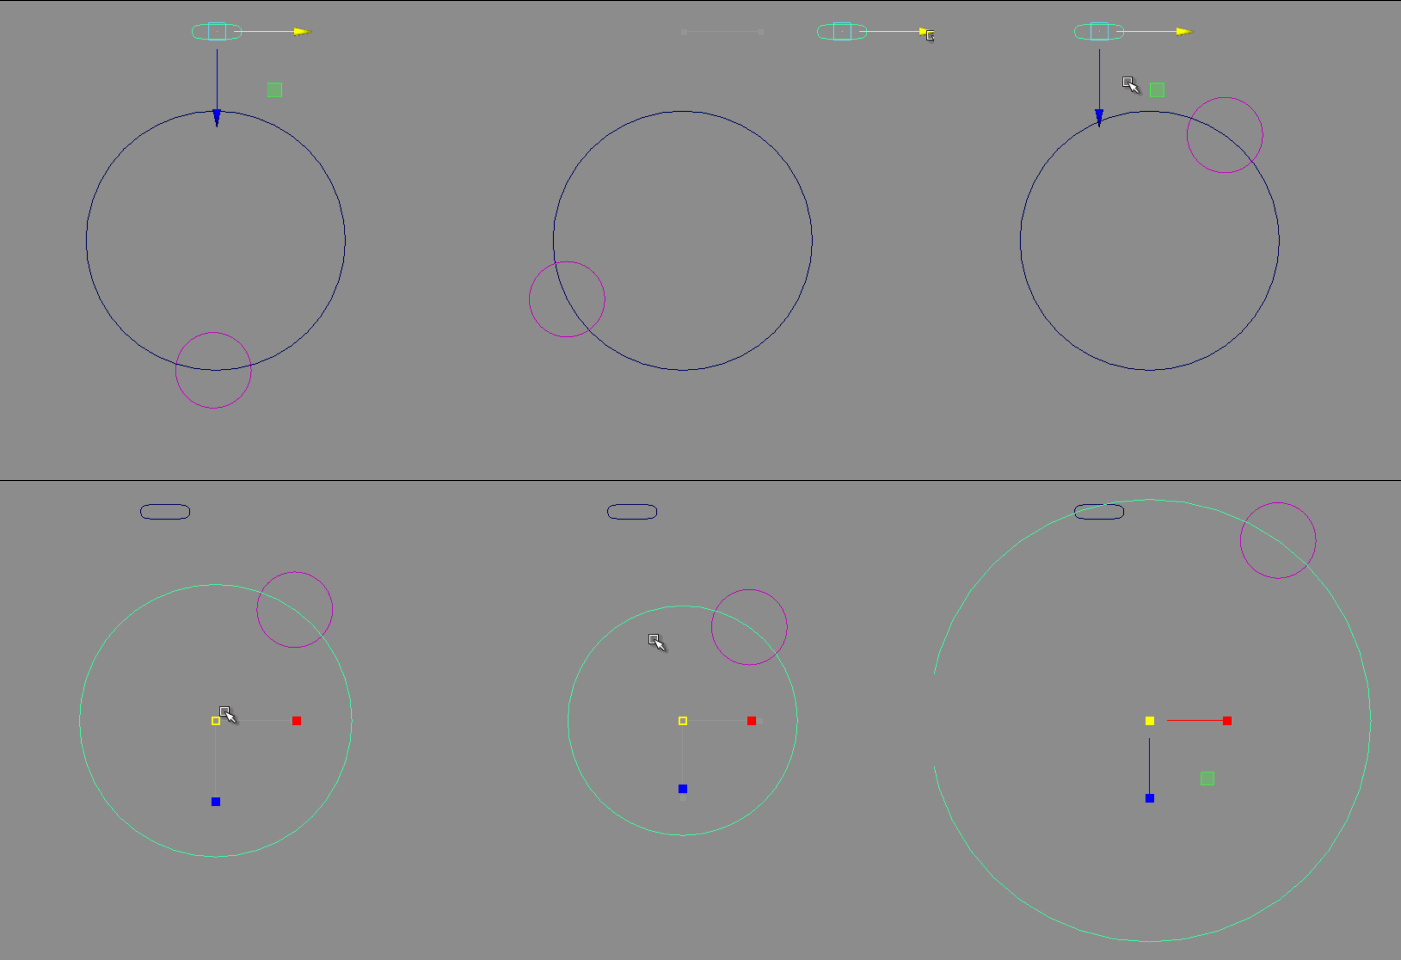
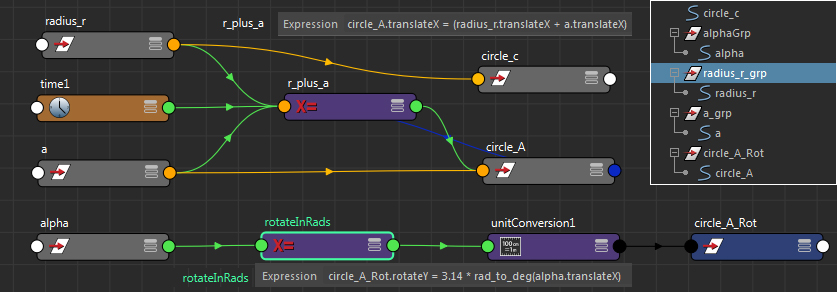
Two very simple expressions that create tangent circles (also known as kissing circles).
melExpression-KissingCirclesNWJ
relationshipsWithExpressions
Nodes and expressions can build almost any kind of relationship we want.

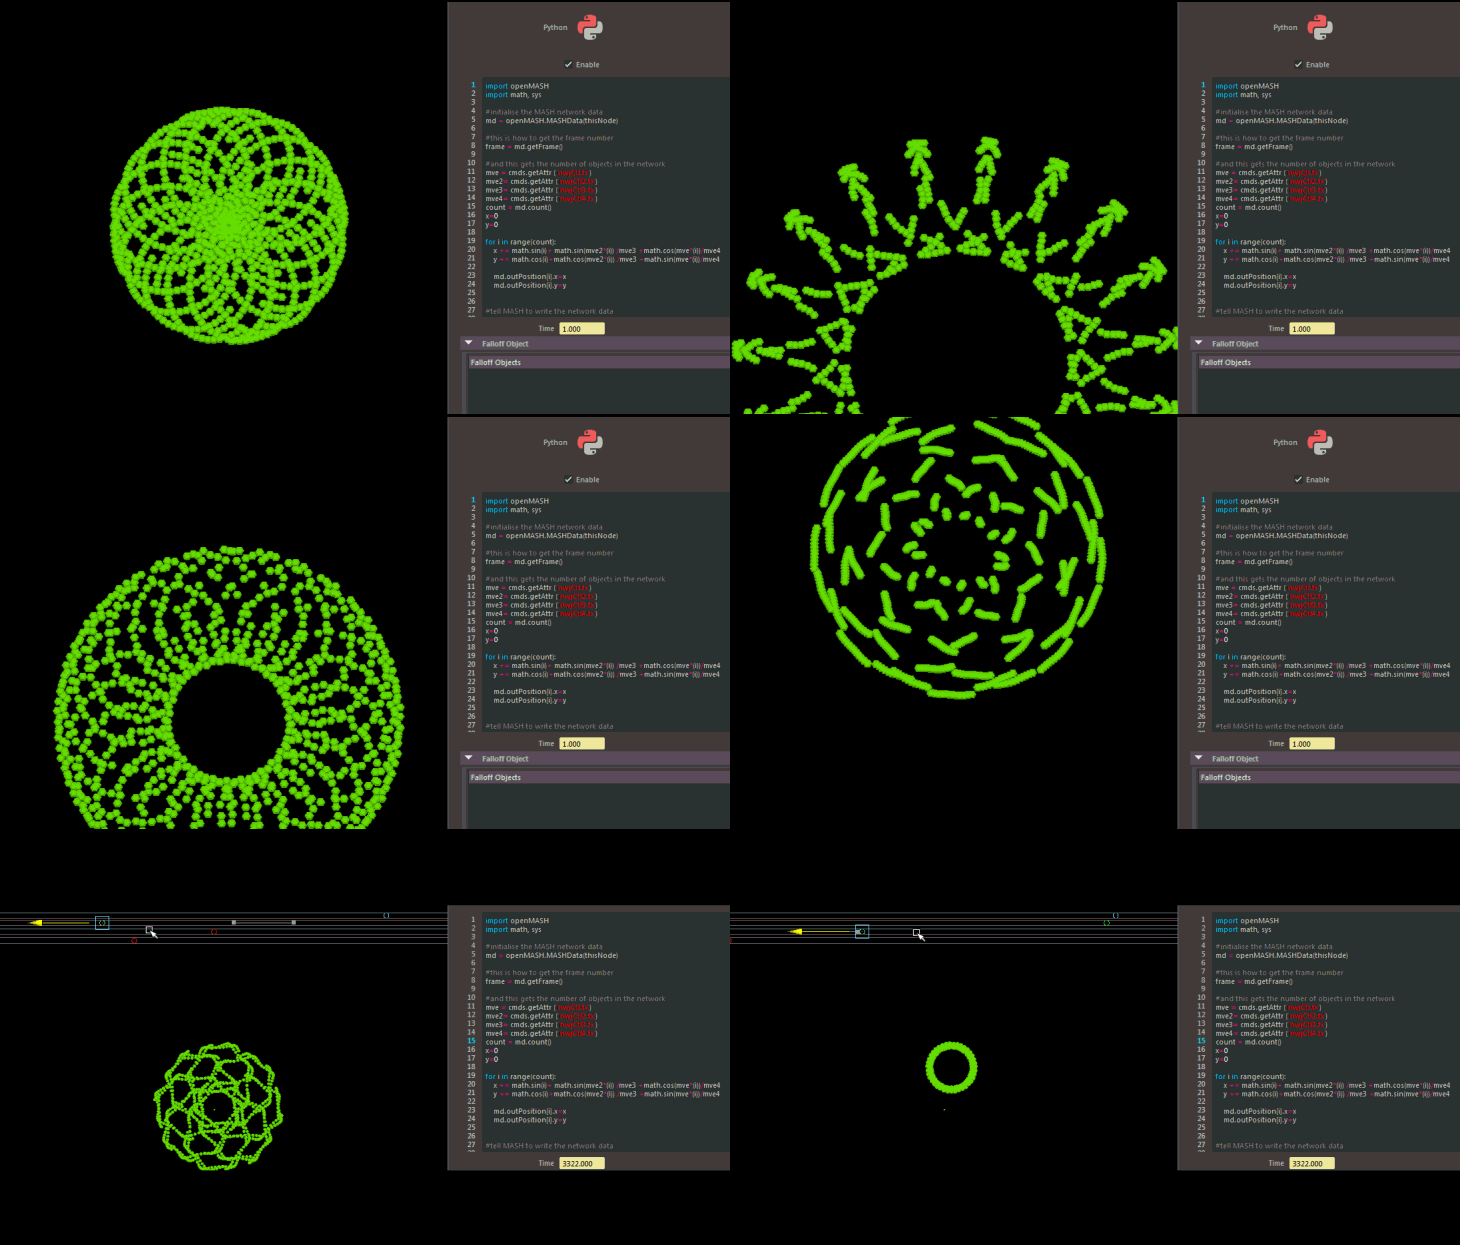
4. Mash Python node (Maya)
mashNodes01.jpg
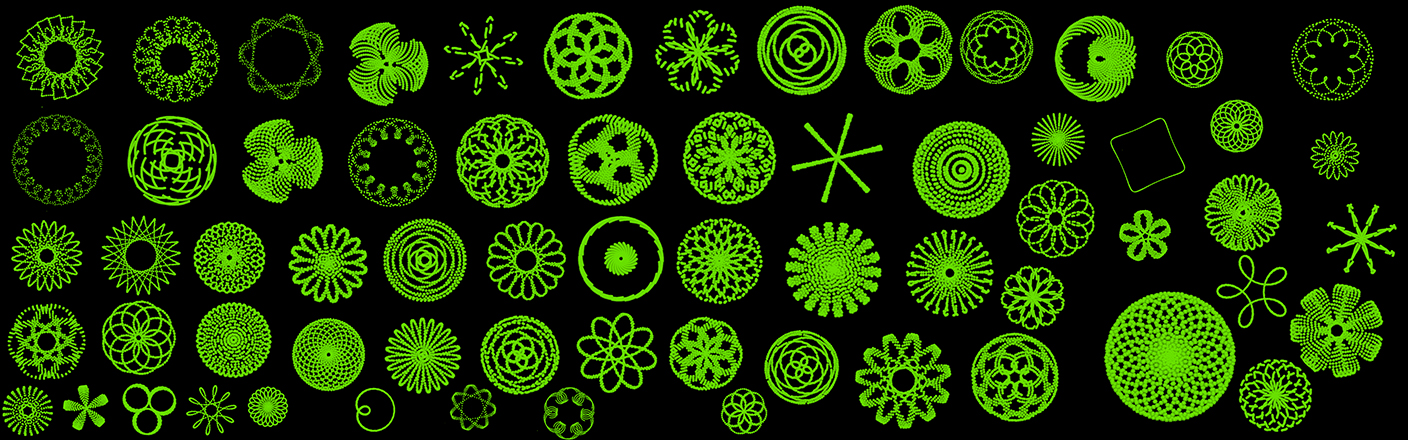
Python Node Test with controllers piped in as variables - Expression: (cos(t) + cos(6t)/2 + sin(14t)/3, sin(t) + sin(6t)/2 + cos(14t)/3) - (see article "Creating Art with Mathematics"). Perhaps usful patterns for stone placement or tiles of some sort.

paterns_maya_pythonNode_mash03


radCosSonCirclesMayaNodes04
paterns_maya_pythonNode_mash

Friday, 5 February 2016

Hunting Humans

Hunting humans - Red Demon
Modeling:      Maya + Zbrush
Texturing:      Zbrush + Photoshop
Rendering:     Mental Ray
Compositing: Photoshop

Friday, 15 January 2016

Sunday, 19 October 2014

Friday, 19 September 2014

Bipedal Auto-Rig and Animation Tests

A learning Exercise for scripting a Bipedal Auto-Rig with Mel and Python. Animation tests of the rig:

Wednesday, 11 July 2012

Bipedal Auto-Rig - WIP

This is a test of an auto-rig for Maya that I have script in Mel - largely based on Arron Holly's rigging techniques. No weights have been painted and I didn't try to position the joints perfectly as it's just a test.
I still have some changes/fixes to make and some additions to add before I start animating a few characters.

I have been working on a facial rig as well but that's a little ways off....

Wednesday, 21 March 2012

Learning Mel - Early Days

I love how using Mel saves me countless hours. When I think of all that time I could have saved  in the past before I knew how to do this :)
For example – setting up an Ik Fk blend for rotation and scale is a easy as...


    string $ArmNm[] = {"shld01", "elbA01", "elbB01"};
    for ($jntSw=1; $jntSw<4; $jntSw++)

    {
   orientConstraint
       -n ($prefix + "_" + $partName + "_" + ($ArmNm[($jntSw-1)]) + "_jntOri")
           ($prefix + "_" + $partName + "_" + ($ArmNm[($jntSw-1)]) + "_ik")
           ($prefix + "_" + $partName + "_" + ($ArmNm[($jntSw-1)]) + "_fk")
           ($prefix + "_" + $partName + "_" + ($ArmNm[($jntSw-1)]) + "_jntBnd");
   createNode blendColors
       -n  ($prefix + "_" + $partName + "_" + ($ArmNm[($jntSw-1)]) + "_jSBld");
   connectAttr    
           ($prefix + "_" + $partName + "_" + ($ArmNm[($jntSw-1)]) + "_ik.scaleX")
           ($prefix + "_" + $partName + "_" + ($ArmNm[($jntSw-1)]) + "_jSBld.color1R");
   connectAttr      
           ($prefix + "_" + $partName + "_" + ($ArmNm[($jntSw-1)]) + "_fk.scaleX")
           ($prefix + "_" + $partName + "_" + ($ArmNm[($jntSw-1)]) + "_jSBld.color2R");
   connectAttr
           ($prefix + "_" + $partName + "_" + ($ArmNm[($jntSw-1)]) + "_jSBld.outputR")
           ($prefix + "_" + $partName + "_" + ($ArmNm[($jntSw-1)]) + "_jntBnd.scaleX");
    }


In the example above I've given procedure arguments for $prefix (character Name), $partName (body part like "arm") and I've used the string array ($ArmNm[]) to capture the elements within $partName - in this case the shoulder joint and the two elbow joints.

 A `for loop` cycles through 3 times (<4) and matches the $armNm array containing the elements within the $partName, (-1 because arrays start with 0 in Mel), to the newly created blend nodes for scale blending and orient constraints for rotational blending. These are then connected to the bind joints.

Thursday, 1 March 2012

Stretchy Ribbon Spine

Here is a test of a Mel script I wrote for a Stretchy Ribbon Spine. I created two buttons for it. The first one creates a system of locator's which can be moved to line up with the characters spine and the next creates the spine itself based on the orientation and positional information of the locators and zeros the rotational values on the joints.


I've still got allot to learn about organizing my scripts properly and have been reading everything I can get my hands on regarding the best methods/standard procedures..... but gees it's fun.

Tuesday, 28 February 2012

Learning Notes - Python and Mel


I've played with Mel, (Maya embeded language), on and off over the years but, to be honest, I never dug deeply into it. I can't figure out why - would have made life so much easier. I'm thoroughly enjoying the process of learning Mel and python at the moment. It's so very addictive.... and helpful :)


Here is a few of the basics in mel...
Data types
Integers
          int $areWholeNumbers = `##`
Floats
          float $areFractions = `##`
Vectors
          vector $areX,Y,ZPositions = <<X,Y,Z>>
Array
          $##[starts at 0]
Conditional  Statements for mel
<: - less then, >: - greater then, == - equal to: != - not equal to, >= - greater or equal to: <= - less or equal to ?: -if else && -logical and || -logical or  +,- -plus,minus ^ -vector cross product / -divide * -multiply % -modulo ++, -- -increment,decrement by 1 ! -not
  Loops/Iterantion in Mel
While-Loops
    example;
          int $x =0;
          while ($x <10)
          {
                      $x =$x+1;
             print ($x + "\n");
          }
For-Loops   (loop start)   (loop end)   (increment)
    example;
          for ($t=0; $t<6; $t=$t+1)
          {
                       joint -name ("naths_" + "_jnt");
          }

For-In-Loops
    example
     select bob;
          string $bobsInHere[] =`ls -sl`;
          for ($allBobsAtributes in $bobsInHere)
          {
                    string $bobsAtributes[] = `listAttr -write $allBobsAtributes`;
                   for ($bobsWritable in $bobsAtributes)
                    {
                              print ($bobsWritable + " is a writable attribute of bobs" +"\n");
                    }
          }


Do-While Loop 
   int $t = 1;
        do 
{
    $t += 3;
print ($t + "\n");
}
 while ($t <= 10);


Special Characters of note
\ =escape,
\n = newline,
/t = tab,
 \r = carriage return
Procedures

An example is a global procedure. The procedure is called from memory with the bottom line and arguments are given for width, height, depth and name.
Example;
  global proc nathansCubeIT (float $width, float $height, float $depth, string $name)
     {
          polyCube -width $width -height $height -depth $depth -name $name;
     }
                                      nathansCubeIT 5 6 4 nathCube;

Thursday, 23 February 2012

Stretchy Ribbon Spine


I've been experimenting with different ways to deform and animate my "Secret Life of Objects" characters.

They all twist, stretch and squash....

Previously I used a stretchy spline Ik. This is a really simple technique which involves joints being spread evenly along, and constrained to, a curve. The curves length, (when it’s stretched) is divided by its initial length and the result is input into the joints scale so that the length of the joint chain matches that of the curve. Unfortunately joints are straight and the curve is… well… curved so the last joint on the chain sometimes overshoots the curve length. Rotate values are passed evenly between the top and bottom controls with an up vector object.

A slightly old but great set of tuts by Aaron Holly uses a “ribbon spine” instead.

Instead of a curve Aaron uses a nurbs surface and parents the bind Joints under follicles created on that surface. The surface is then bound just like the stretchy spline with joints for animation and aim vectors are used to constrain the direction the joints point. Rotational values are output from top and bottom controllers as a percentage relative to the joints position which is then averaged and fed into the joints to evenly distribute them. The center joint, for example, receives 50/50 from top/bottom. 

The benefit is that you can turn/rotate your character as many times as you want and the scale of the joints won’t overshoot – nice. Here is a little test I did with ten joints and three mid-section controllers. They don’t quite rotate the way I want but it will eventually... I also want to create a script for my S.L.O.O rig once I figure out how to get the animation features I want/need - a good excuse to learn mel.


Wednesday, 8 February 2012

Lip Sync Test

I recently had a read of Jason Osipa’s book "Stop Staring" and what a great book it is.  I can instantly see the potential in Osipa's way of thinking regarding Visimes Vs Phenetics. Time to go back to basics and learn to do this properly. This is a quick test so it's a little average but it's very quick. 


I never knew my voice could sound like that :)

One thing I should make note of for myself comes in the form of the McGurk effect which shows us that the visual shape of a sound  can over ride the sound itself - for example "B" can become "F". HERE is the link to a BBC documentary about it. This is one of the reasons that visuals shapes have to look right or the viewer might be confused. 

Saturday, 4 February 2012

Sticky Lips in Maya


Just playing around with this Maya pluggin for sticky lips...
Video:


Might take some playing but kinda cool and useful for lots of stuff :)