
Showing posts with label Modeling. Show all posts
Showing posts with label Modeling. Show all posts
Tuesday, 1 May 2018
Modeling from perspective drawings in Blender and Maya
1: In this first example I've used the Blender plugin "Blam!". Blam is a camera and projector calibration toolkit. I based my line drawing on this skinny Meriton apartment building.


Thursday, 12 October 2017
Blender modeling Notes


Click HERE for an older interview with Ton Roosendaal. It gives some history and context to blender.
Note: Page last added to on 18/10/17
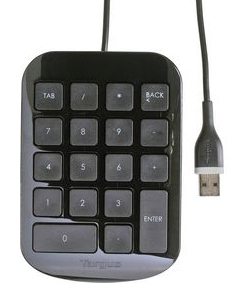
Hotkeys:
Navigation:
- MMB = Orbit
- Ctl + shift + Middle Click /or/ Scroll Wheel = Zoom
- Shift + F5 = Viewport
- 0(numPad) = Camera Mode (Enter/Exit)
- 5 = Orthographic Perspective
- 1/3/7(numPad) = Front/Right/Top View
- Ctl + 1/3/7(numPad) = Back/Left/Bottom
- Home = Frame All
- .(numPad) = Frame Selection
- Shift + C = Reset Viewport
- Shift + F = Video Game Navigation
- /(numPad = Frame Selection
- Z = Wireframe
- Alt + Z = Toggle Texture/Shader
- Shift + Z = Toggle rendered/Shaded
- (Shift + B + release) + Drag = Zoom into Portion
- Shift + A = Add Objects
- Ctl + Tab = Switch Edge/Vertex/Face panel
- Tab = Edit Object Mode
- Left Click = Move 3D Cursor
- Ctl + A = Apply objects transformations (like freeze trans)
- Y = Edge Split
- Ctl + 1/2/3/0 = Subdivision Amount
- Ctl + # = Add Subdivisions
- U = UV uwrap
- K = Knife Tool
- I = Inset
- E = Extrude
- Alt + M = Merge Vertices (options panel ex: merge to centre)
- Ctl + R = Loop Cut(Scroll wheel to add loops - pre right click)
- Ctl + J = Join Objects
- Ctl + B =Bevel (scroll for subdivs)
- G + G = Slide Vert/Edge/Face
- V = Rip
- Alt + V = Duplicate Edge Loop on Object
- F = Fill/Bridge Edges/Verts
- P = Separate Selected (Verts/Face/Edge)
- G + O = Offset and slide vert across edge
- D = Draw Tool
- Click + Drag = Add
- Shift + Click + Drag = Subtract
- F + Drag = Brush Radius
- Shift + F + Drag = Brush Strength
- C = Clay Brush
- 2 = Clay Brush
- G = Grab Brush
- 7 = Grab Brush
- I = Inflate/Deflate Brush
- 8 = Inflate/Deflate
- Shift+5 = SculptDraw
- Shift+6 = Smooth
- S = Smooth Brush
- Shift+C = Crease Brush
- L = Layer Brush
- 9 = Layer Brush
- M = Mask Painting
- 0 = Mask
- K = Snake Hook Brush
- Shift+T = Flatten/Contrast Brush
- P = Pinch/Magnify Brush
- 1 = Blob Brush
- 3 = Clay Strips Brush
- 4 = Crease Brush
- 5 = Fill/Deepen
- 6 = Flatten/Contrast Brush
- Shift+1 = Nudge Brush
- Shift+2 = Pinch/Magnify Brush
- Shift+3 = Rotate
- Shift+4 = Scrape/Peaks
- Shift+7 = Snake Hook
- Shift+8 = Thumb
Moving Objects:
- G = Move (+ X/Y/Z to Constrain)
- S = Scale (+ X/Y/Z to Constrain)
- R = Rotate (+ X/Y/Z to Constrain)
- G + 5 = Move 5 Units
- R + 2 = Rotate 2 Units
- W = Panel (select Bridge)
- Shift + C = Cursor at 000 (plus frame focus)
- A = Select/Deselect All
- B(release) + Drag = Box Selection
- B(release) + Drag + Shift = Box Deselect
- B(release) + Left Click(drag) = Rectangle Select(add)
- B(release) + Middle Click(drag) = Rectangle Select(Remove)
- C + Left Click = Circle Selection(add) - (+ Scroll for Circle Radius change)
- C(release) + Shift = Circle Selection(remove) - (+ Scroll for Circle Radius change)
- Ctl + Left Click - Lasso Selection(add)
- Ctl + Shift + Left Click - Lasso Selection(add)
- Alt + Right Click = Select Edge Loop
- Ctl + Alt + Right Click = Select Edge Ring
- L = Select shared Verts/Edges/Faces
- Ctl + +(numPad) / -(numPad) = Grow/Shrink Selection
- H = Hide
- Shift + H = Hide Unselected
- Alt + H = Unhide
- X = Delete Panel
- Shift + D = Duplicate
- Alt + Shift + D = Duplicate
- Ctl + Alt + Z = Undo History Panel
- Shift + S = Snap Cursor to Selection
- Ctl + Shift + Alt + C = Set Origin (Geo to Origin/Origin to 3D cursor etc)
- Shift + S = Cursor options (ex: Cursor to center)
- Alt + A = Play/Pause
- Shift + Alt + A = Play in Reverse
- Left/Right Arrows = Next/Previous Frame
- shift Left/Right Arrows = Beginning/End of Timeline
- Shift + Up/Down Arrows = Jump Forward/Back 10 Frames
- Shift + Spacebar = Window Focus
- Ctl + Ring Arrow = Scroll through window setups
- Shift F4 = Python Console
- Shift + F10 = UV Unwrap Window
- F10 = Image Window
- Shift + F7 = Editing Window (modifiers etc)
- N = Transform Window Toggle
- T = Tool Bar Toggle
- Ctl + I = Invert Selection
- Shift + F9 = Outliner
- Shift + F3 = Node Editor
- Shift + F11 = Text Editor
- Shift + F7 = Properties Editor
- Shift + F2 = Logic Editor
- Ctl + .(NumPad) = Object Focus
- Spacebar = Search Menu
- M = Move object to Layer Panel
- 1/2/3/4 etc = Layer number

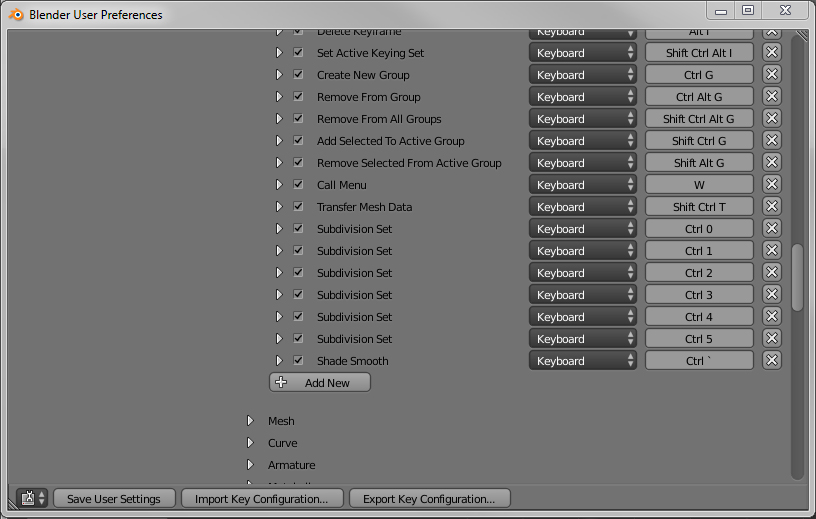
Hotkeys added:
- Ctl + ` = Smooth Shade
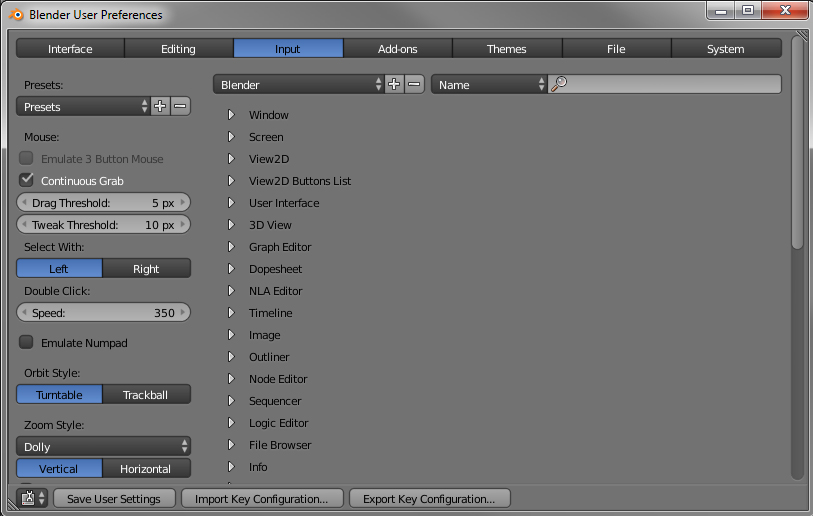
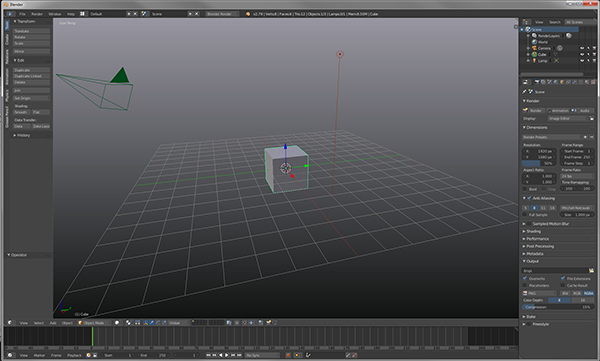
I'm used to the way the Maya Viewport looks so I installed the following "Maya Lover" Theme from Here. It's just cosmetic but I like it.
Modeling Practice - Ant (I'll document my first modeling attempt in blender)
- Shift + S to center the cursor via the panel
- Shift + A to add - mesh - cube
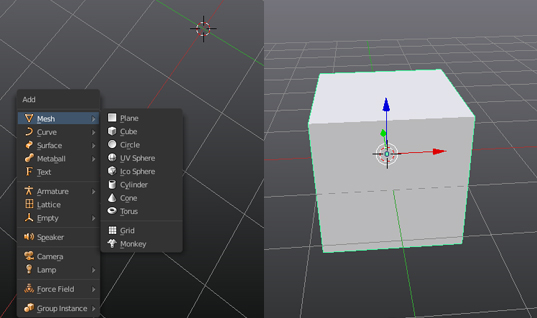
- Ctl + R to place a loop cut through the center of the object
- Z to make the object transparent (so we can select the back faces)
- 1(numpad) to switch to front view
- B + Release + drag for rectangular selection of left side faces
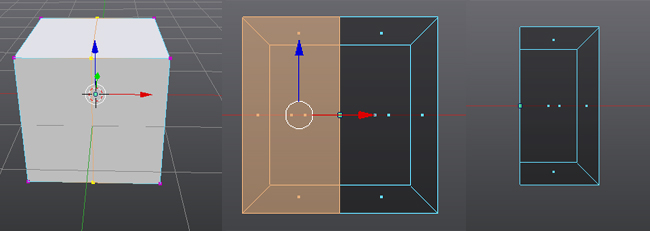
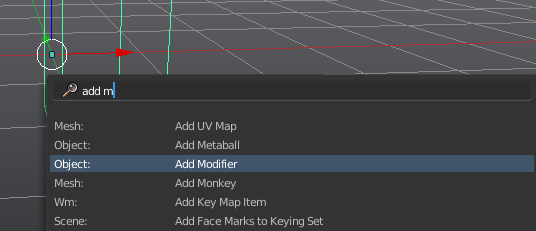
- Spacebar - "type add m" bring up the add modifier panel
- Add mirror modifier
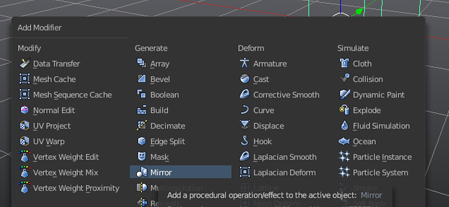
- To constrain the central verts to the Y and Z axis we need to enable "clipping":
- To see the mirrored mesh we need to turn on "cage to modified result":
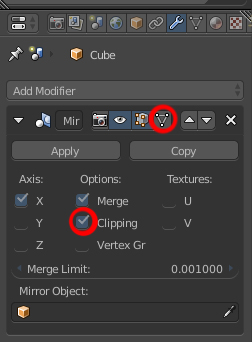
- Show the back facing verts so we can select them

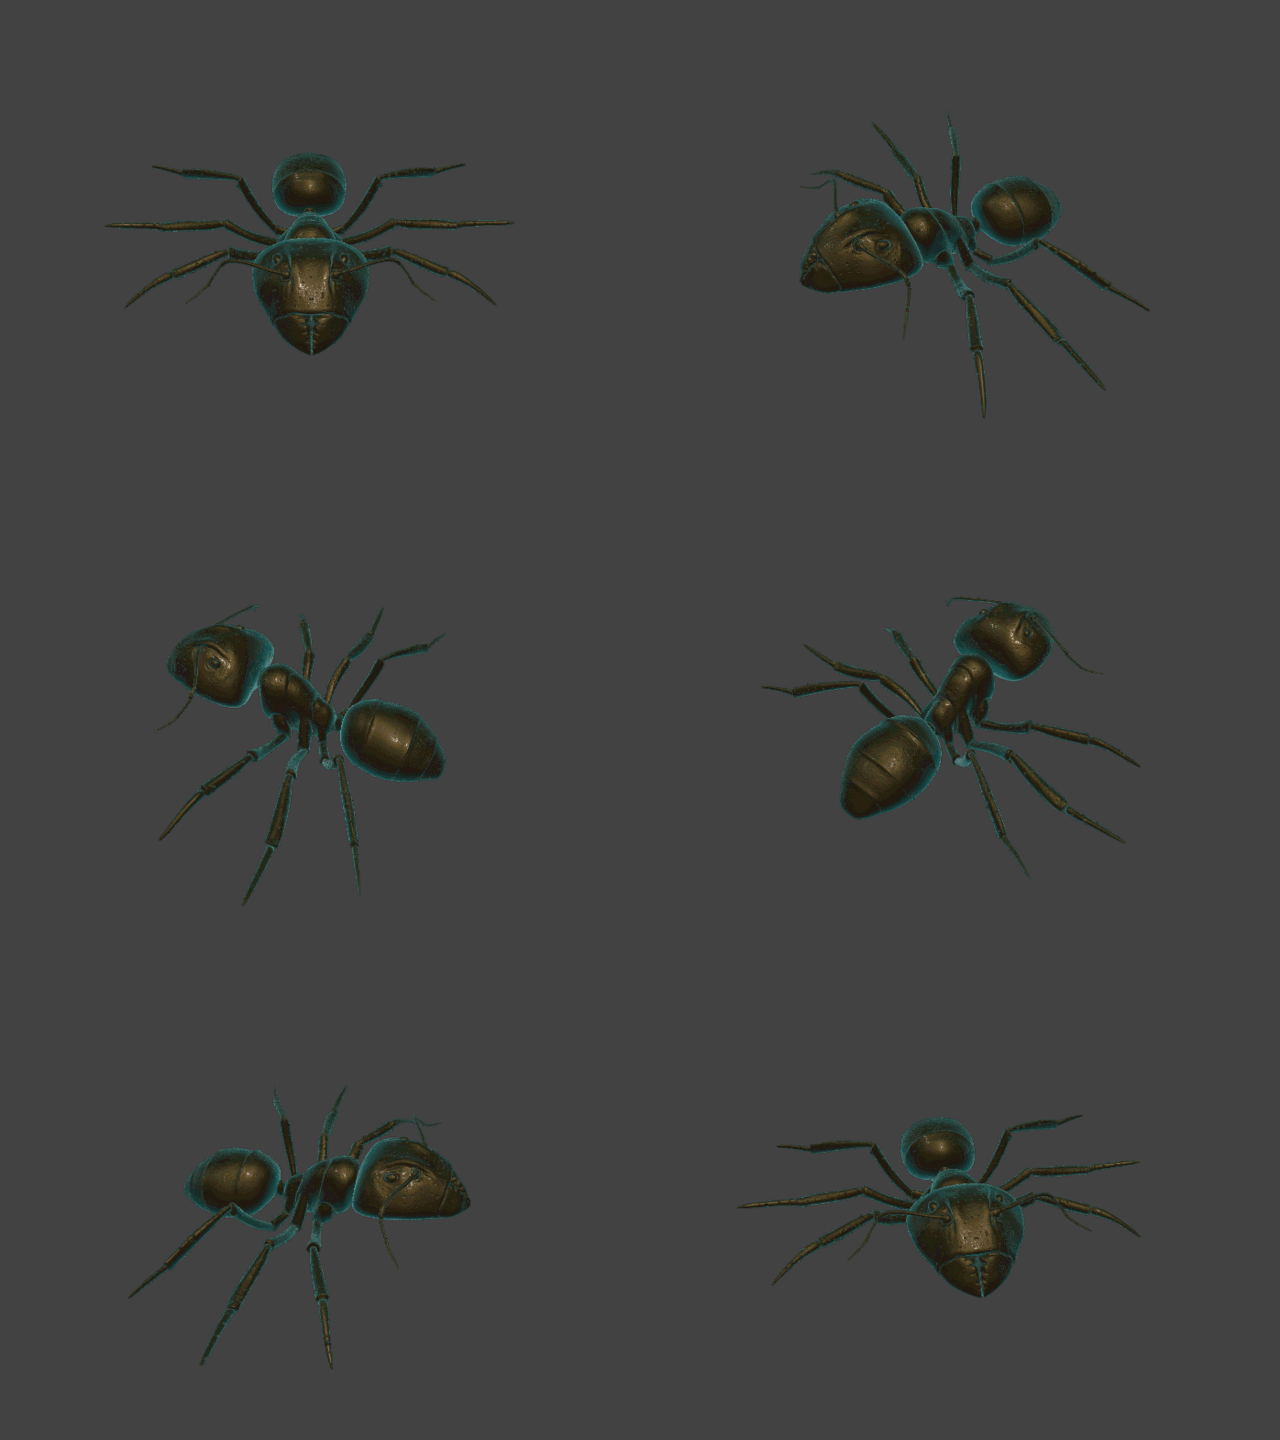
- Base mesh for the head, abdomen and thorax.
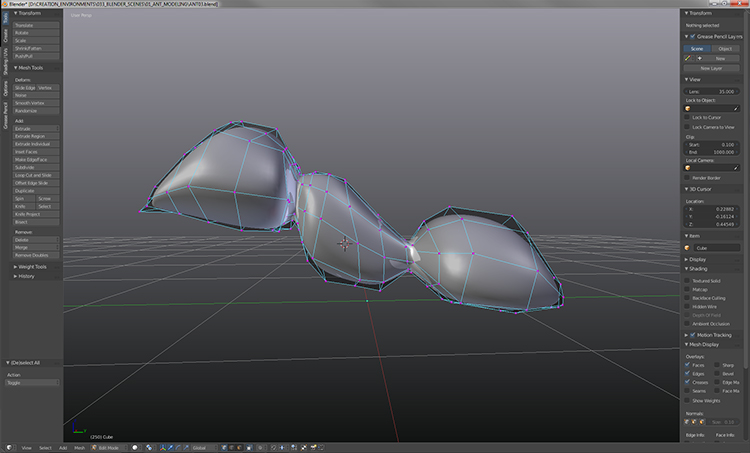
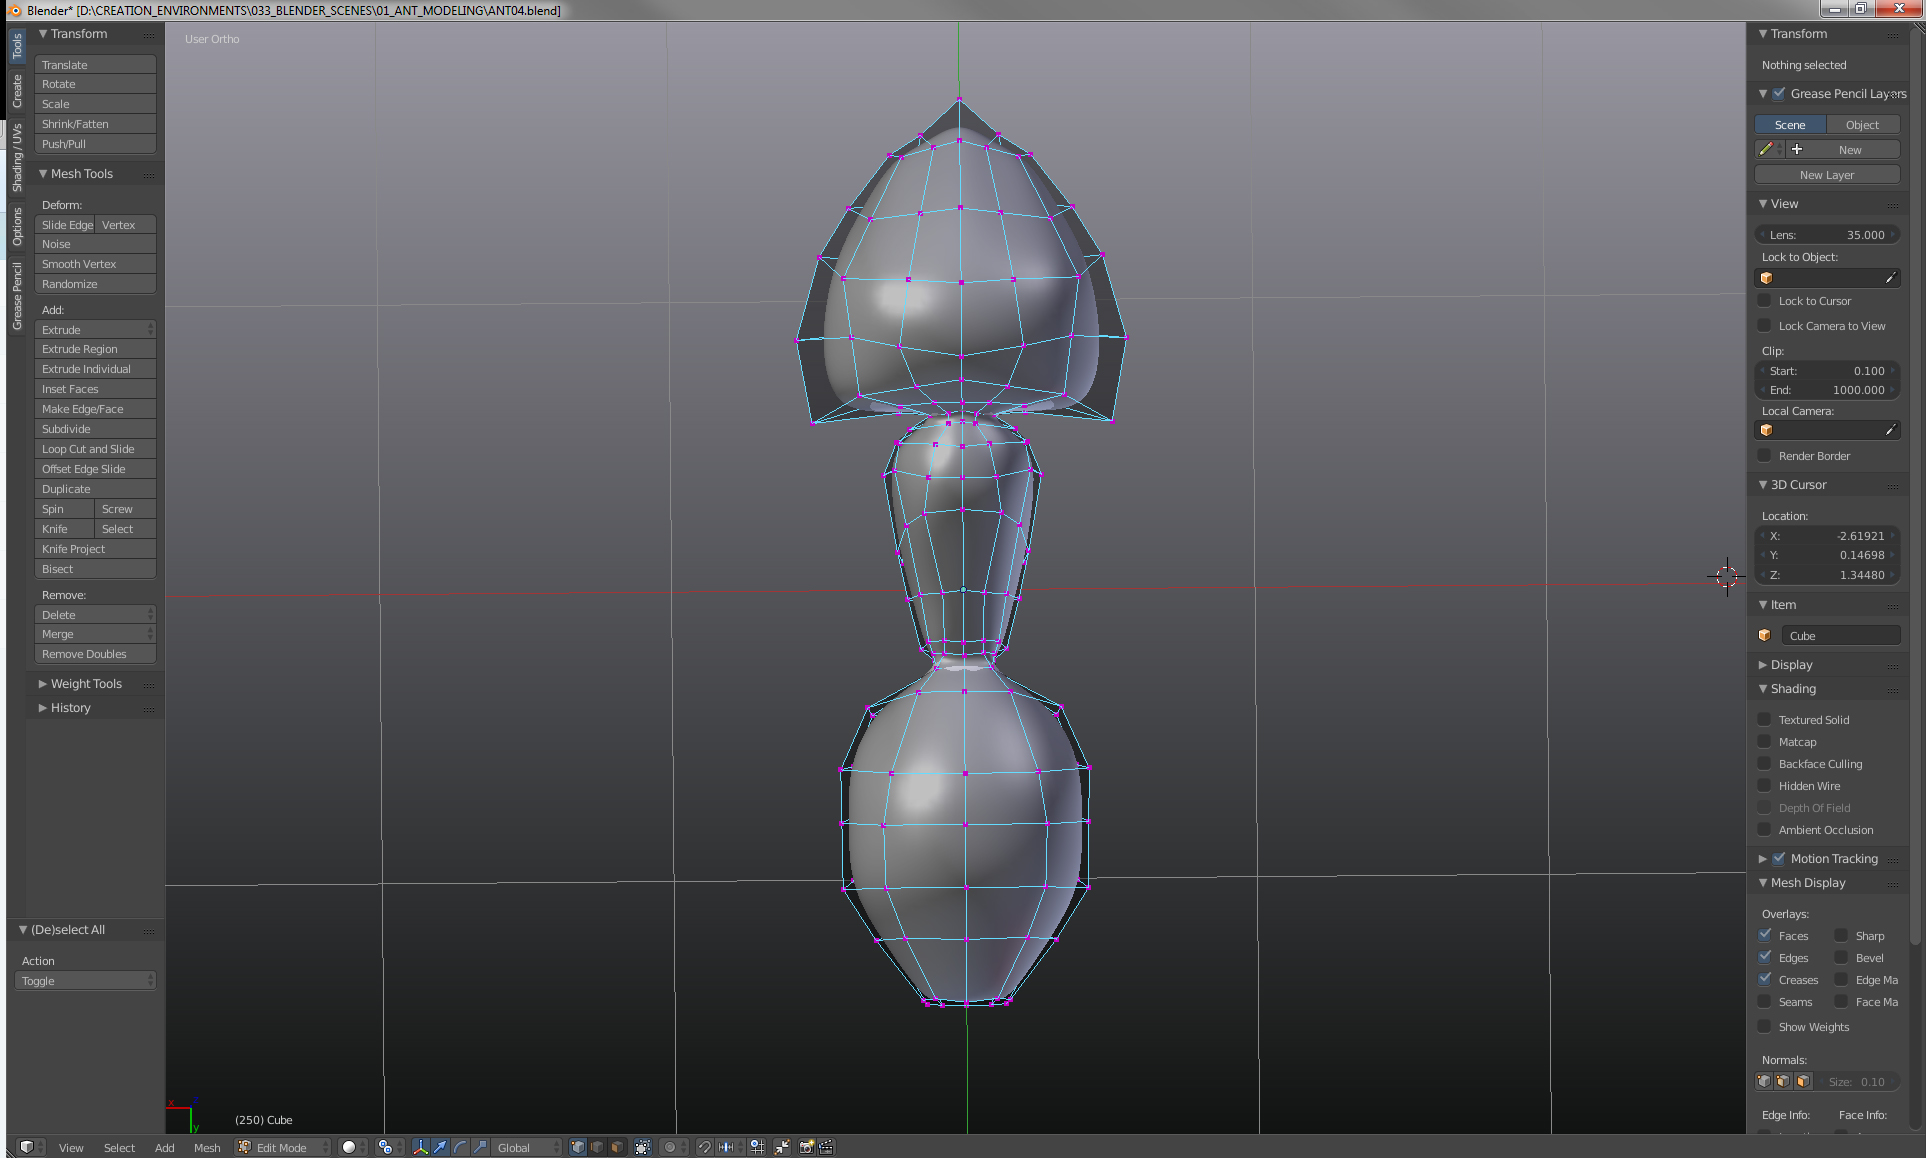
- Extruding some legs
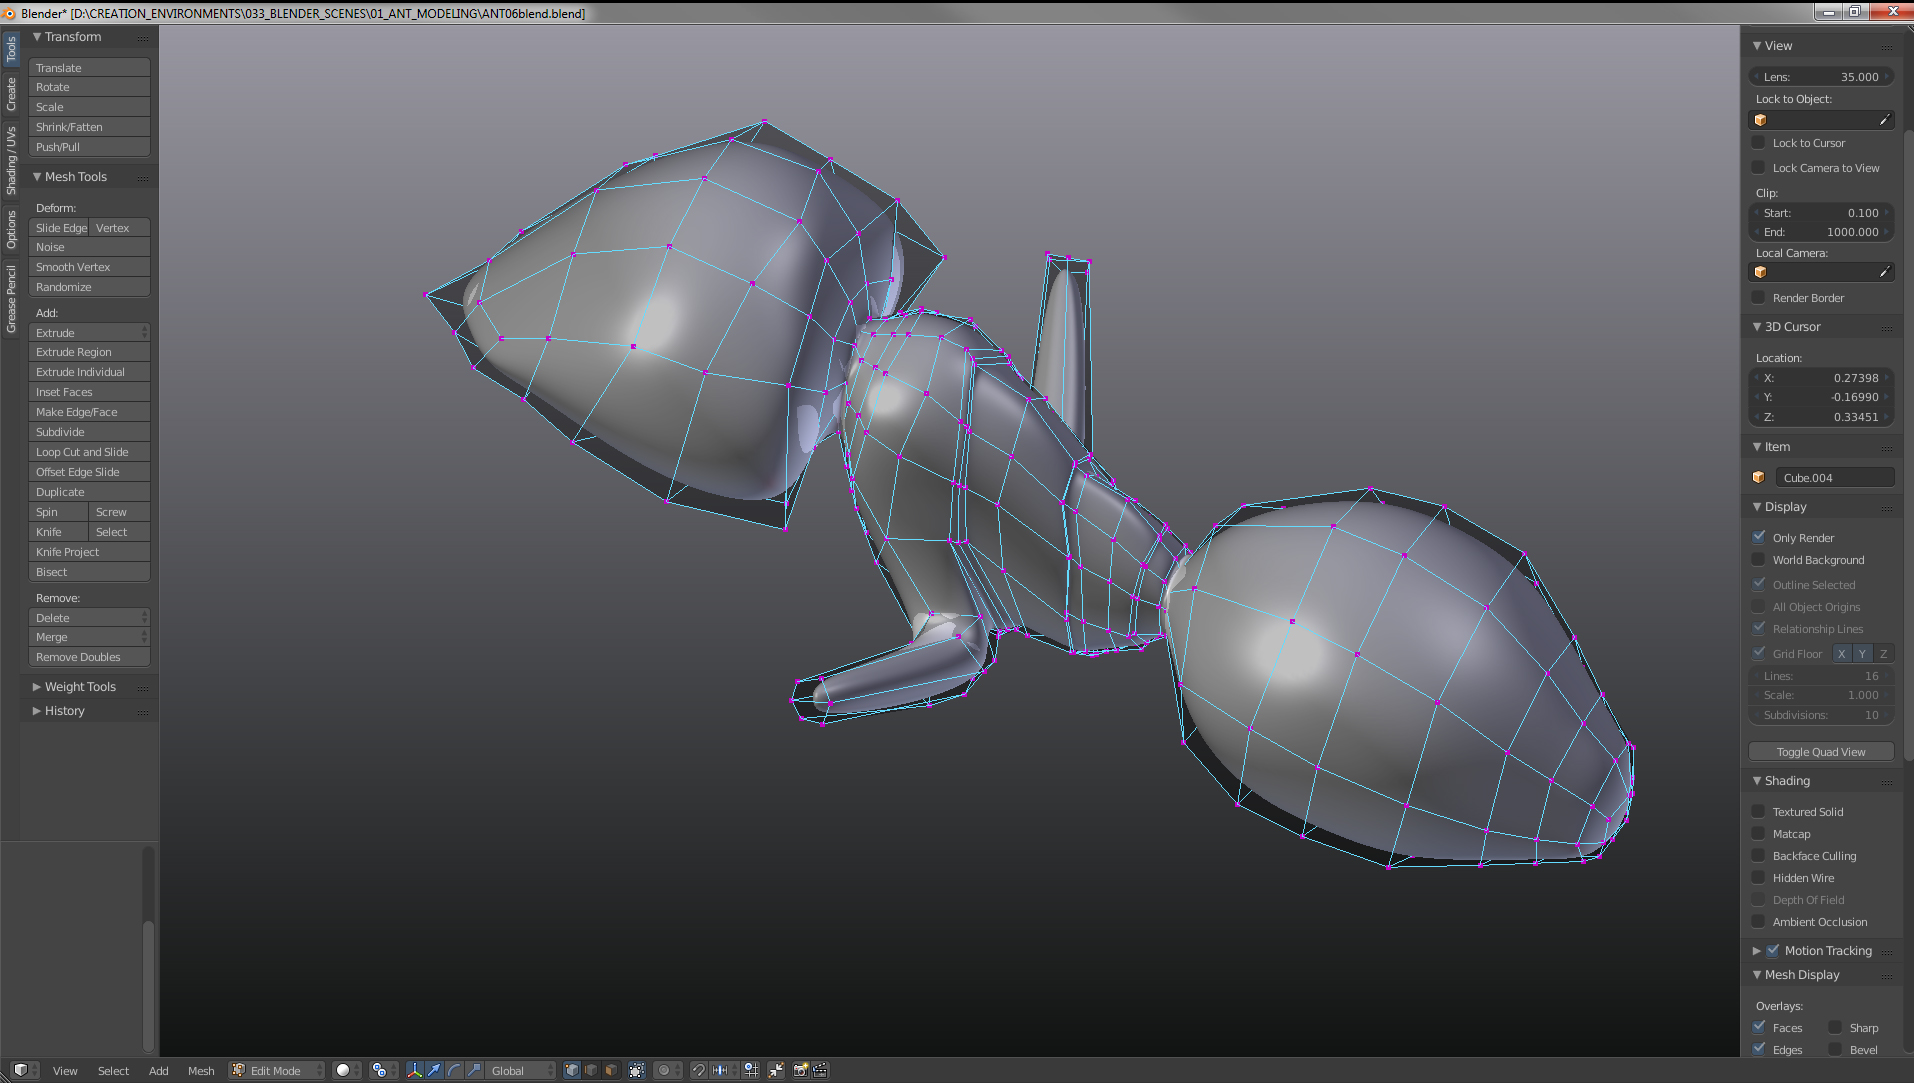
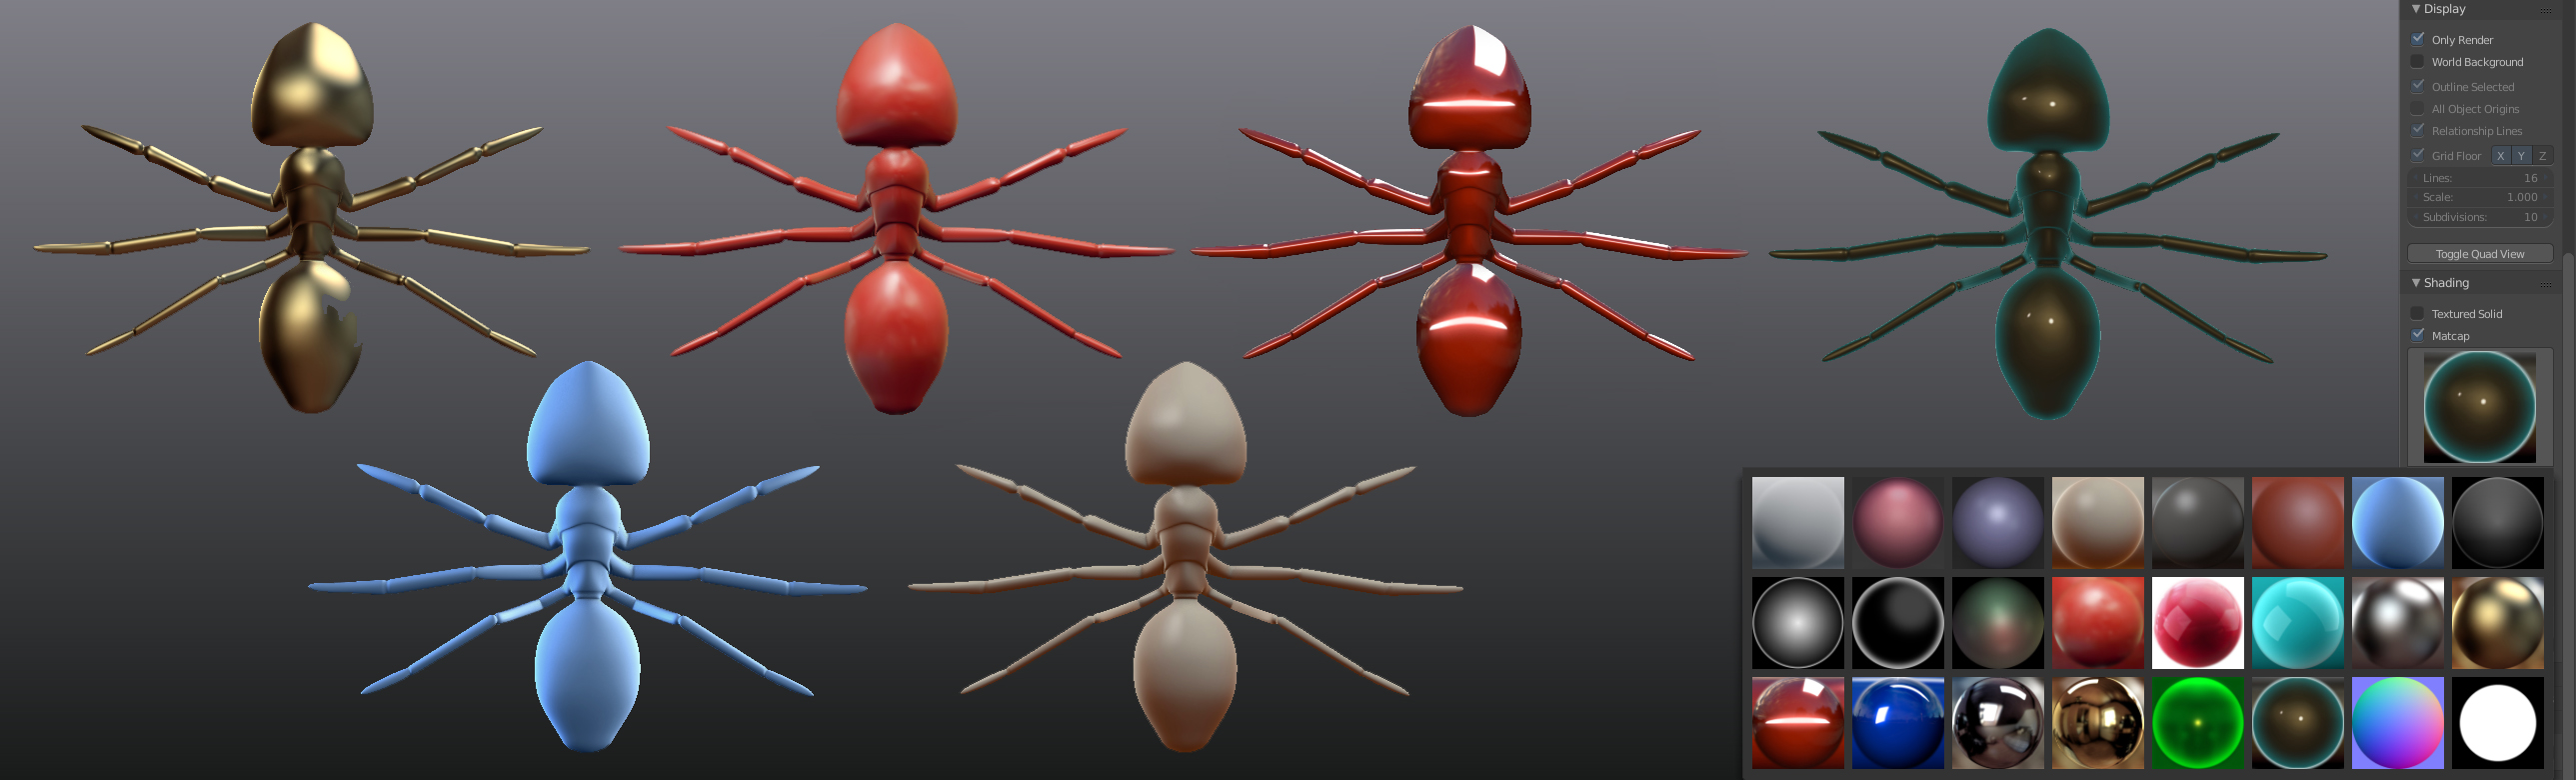
- Within the transforms window(N) / display / Shading there are a number of Metcap shaders which are excellent for picking up surface imperfections while modeling.
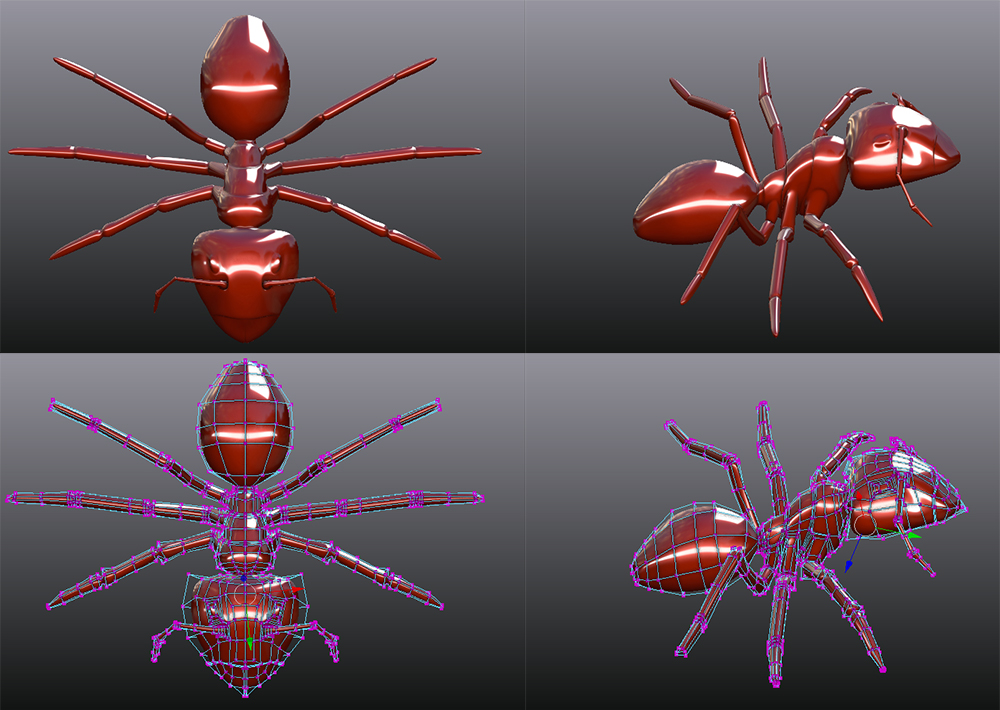
- Subdivisions with cage
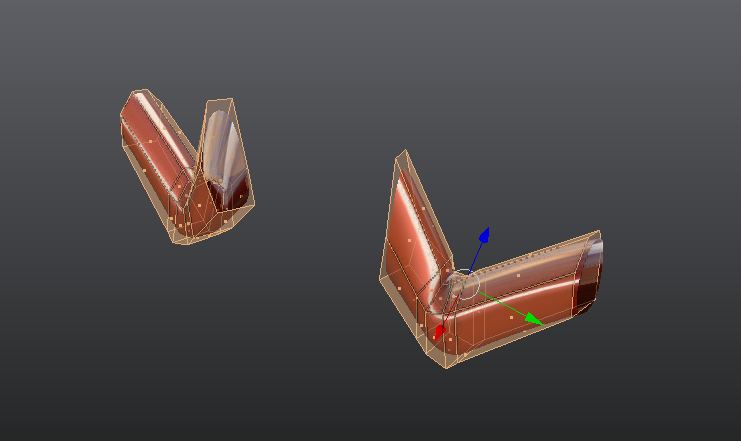
- To isolate an area for modeling the details we select the faces we want to isolate and Shift + H.
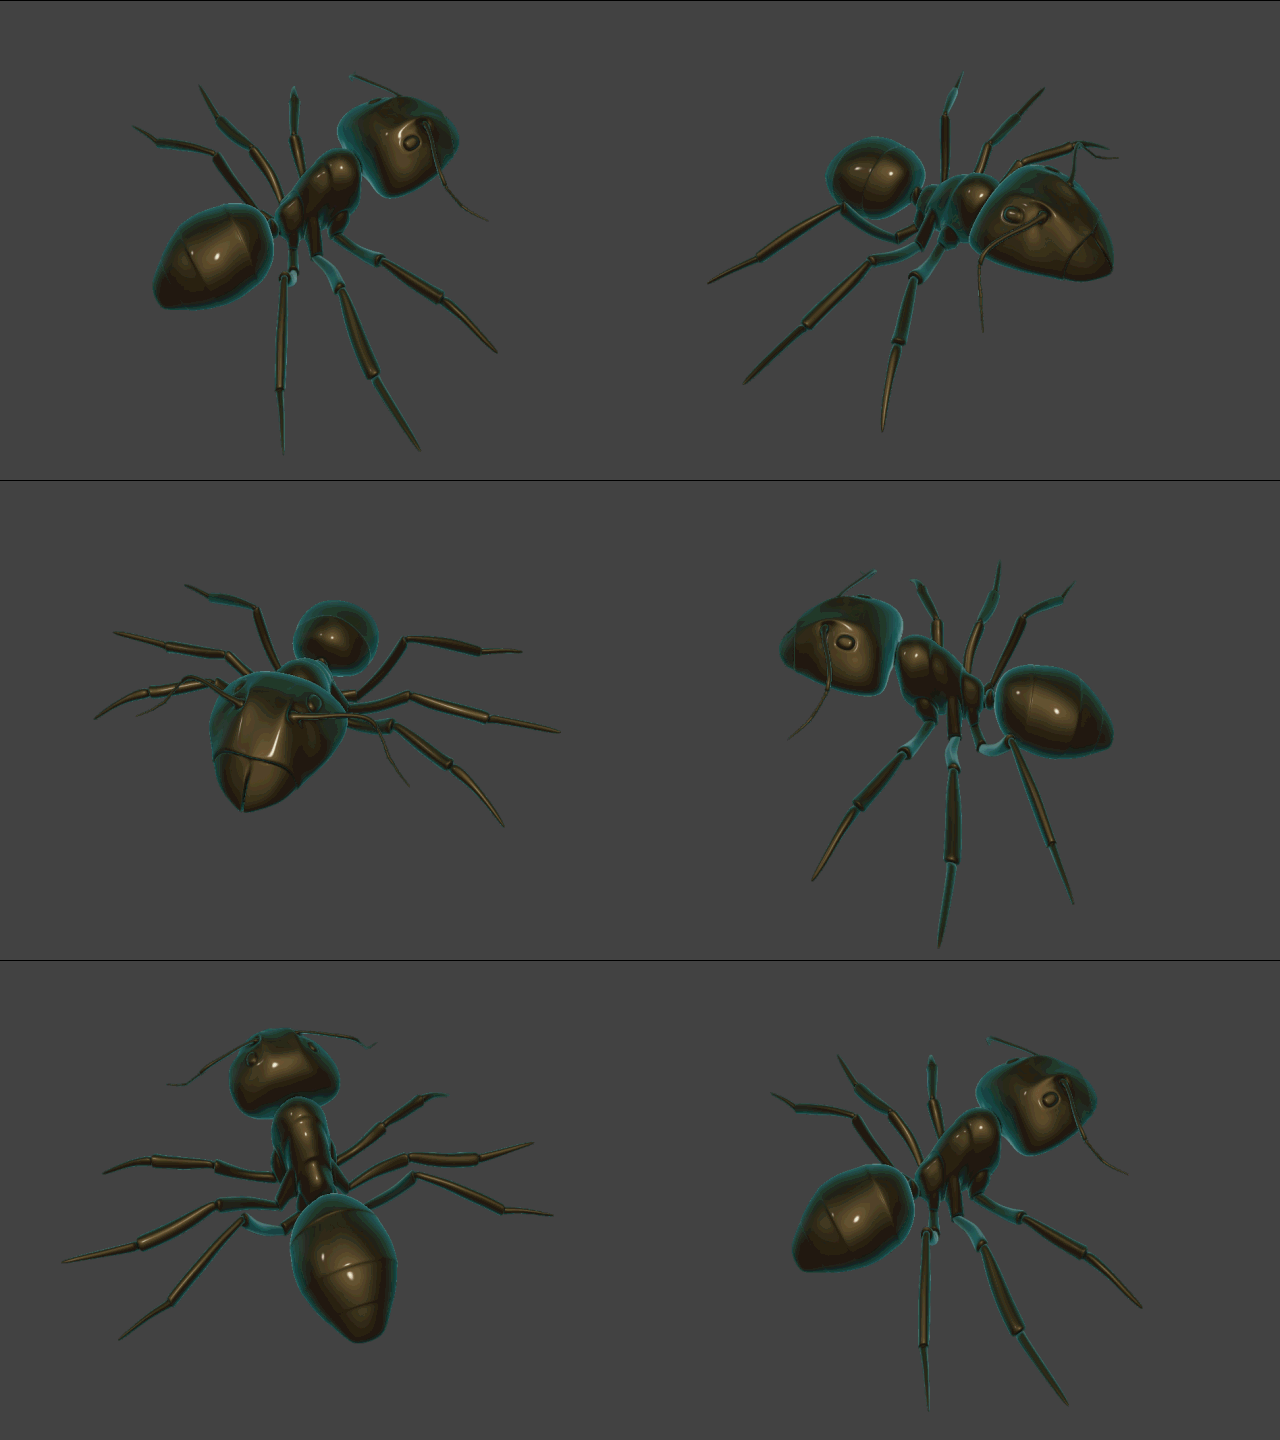
- A little more tweaking
---------------------------------------------------------------------------------------------------------------
Testing Out the Sculpt Brush
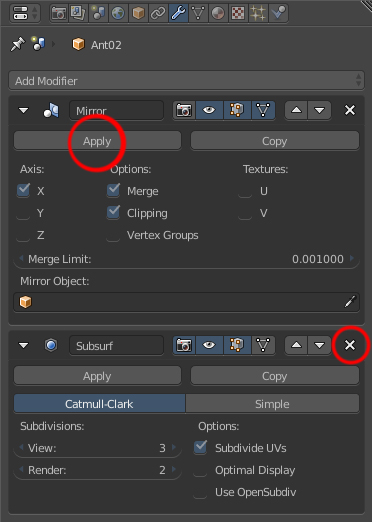
- Before starting to sculpt - Apply Mirror Modifier and delete Subsurface Modifier if we are starting from a model created with the above method
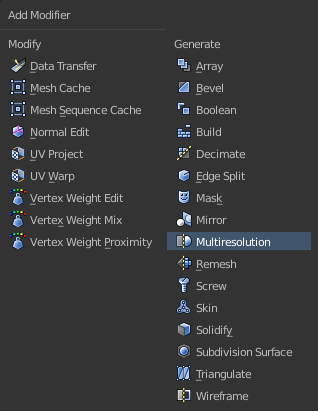
- Spacebar + "add m" to add modifier Multiresolution
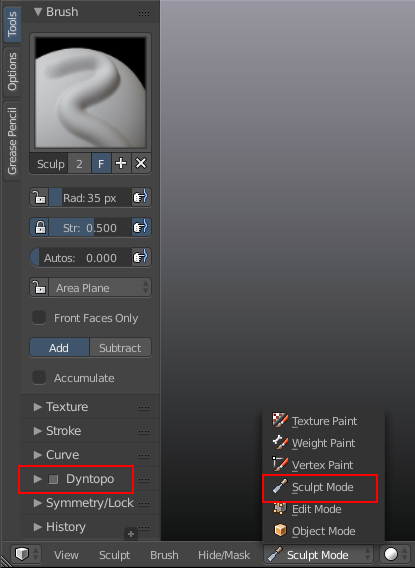
- Switch to sculpt mode
- For roughing in a sculpt we can switch to Dyntopo
- Choose Brush and start sculpting
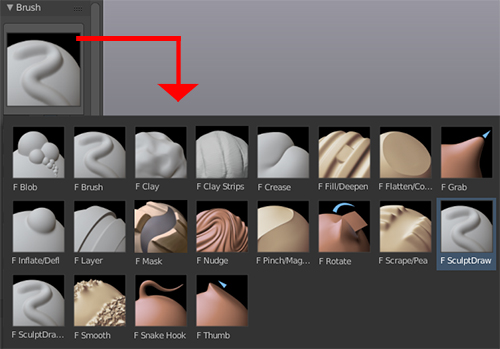
- Hotkeys of Note: F = Brush Radius Shift F = Brush Strength
- Sculpting from a poly UV Sphere, (in Dyntopo mode), allows us to sculpt in a similar way to zbrush - as we would in real life with clay.
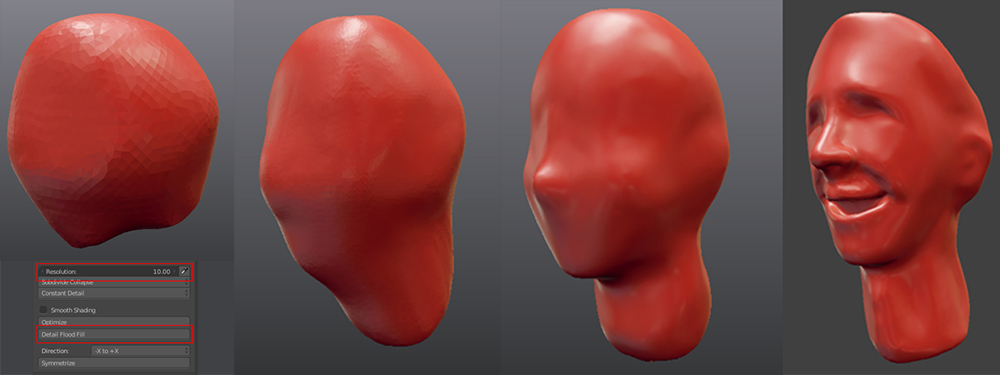
Once we are happy with a Dyntopo sculpt we can retopologize the mesh in one of two ways:
- The easy way is to buy a script like "RetopoFlow" which appears to be similar to Maya's quad draw tools.
- The second/free way is explained HERE by Zacharias Reinhardt.

- Create plane with cursor at 000.
- Ctl + R to slice in half / delete Left Side
- Add Mirror modifier / enable clipping
- Add Subsurf modifier / set as simple (not Catmull-clark)
- Add a Shrink Wrap modifier / choose target mesh / set the offest to .002 / enable "keep above surface" / make sure the triangle icon is enbled so that we see the Verts.
- To avoid selecting verts on the other side - (alt + b = Clipping border) - (alt + b to remove clipping border).
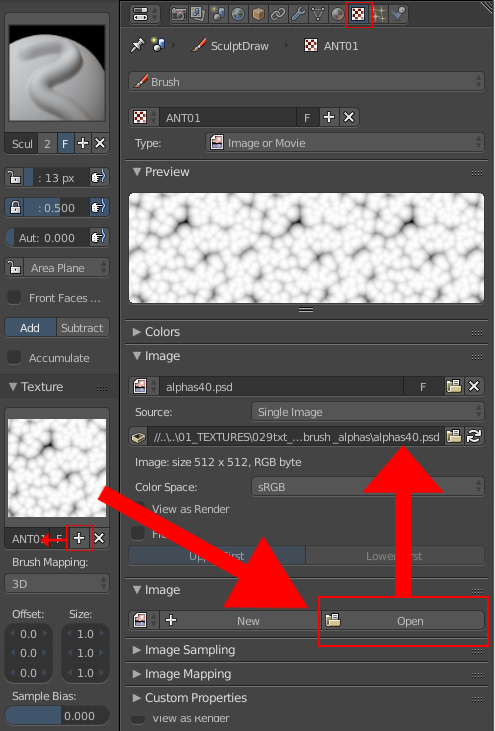
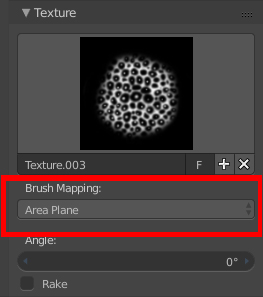
- choose brush mapping style
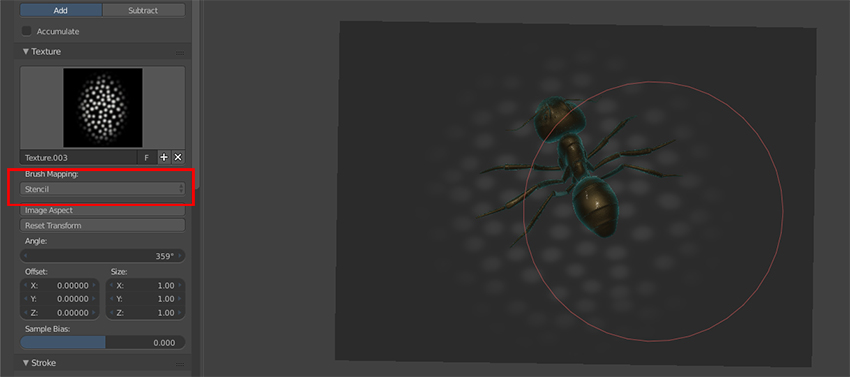
- We can use a stencil - (note hotkeys: RMB = move stencil / shift + RMB = Scale Stencil / Ctl + RMB = Rotate stencil)
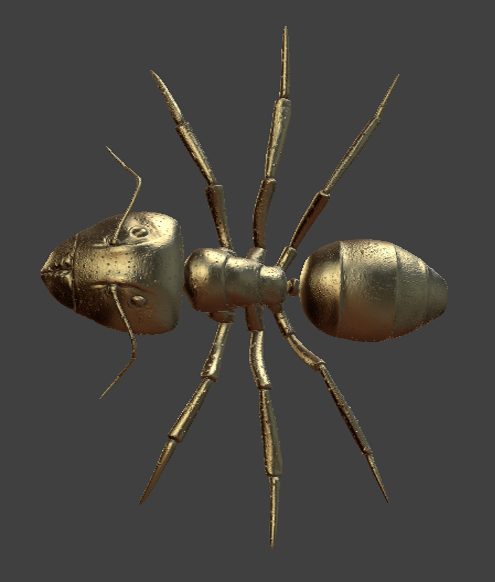
- Some details added to the mesh with alpha brushes
- With a shiny gold met material we can see more details
Modeling with Blender's Skin Modifier
Setup:
- Create plain(shift + C to center Pivot) / Alt + M / Merge at center / Edit Mode / Spacebar/"Add Modifier"/ Mirror/Skin/SubDiv
- Extrude + G + Move / Ctl + A(x,y,z) for Scale / Ctl + R = Add Vert
- Starting with Torso and Feet - a little bit tricky
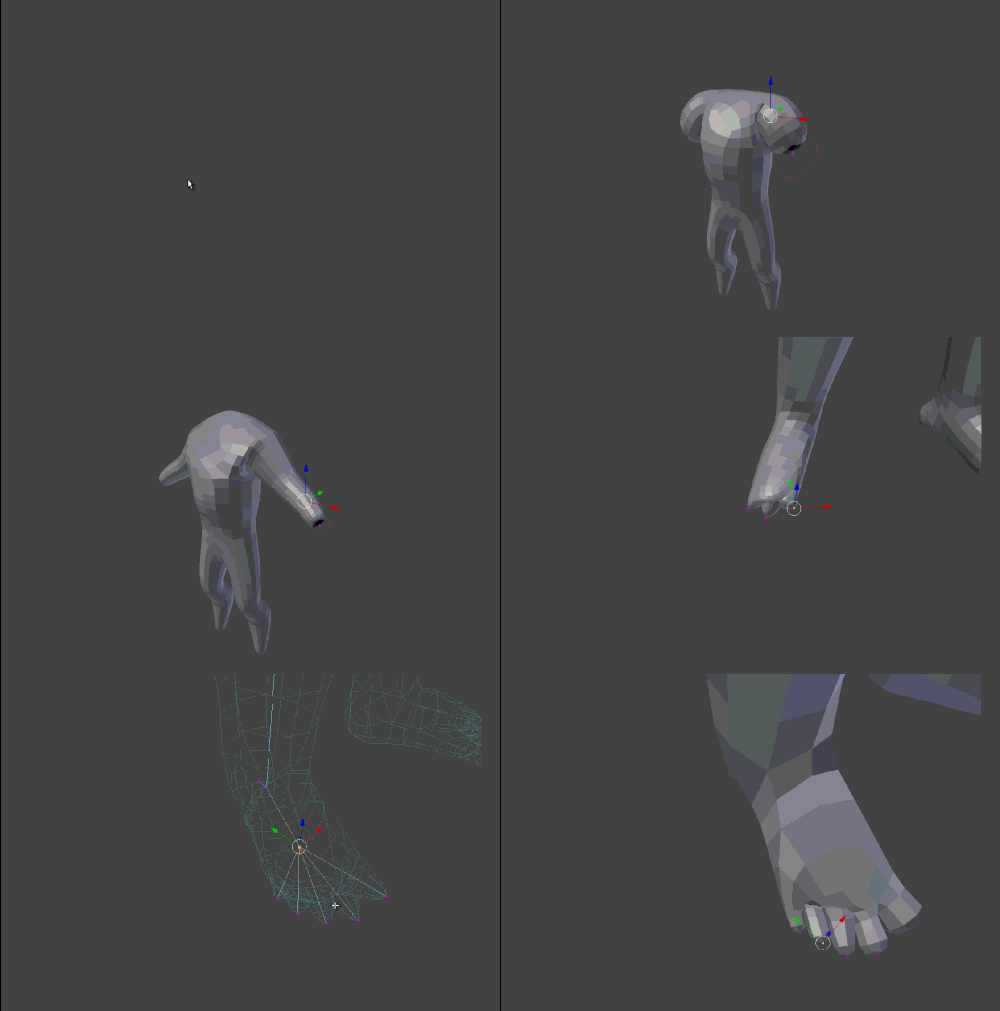
- Attempt at constructing the hand
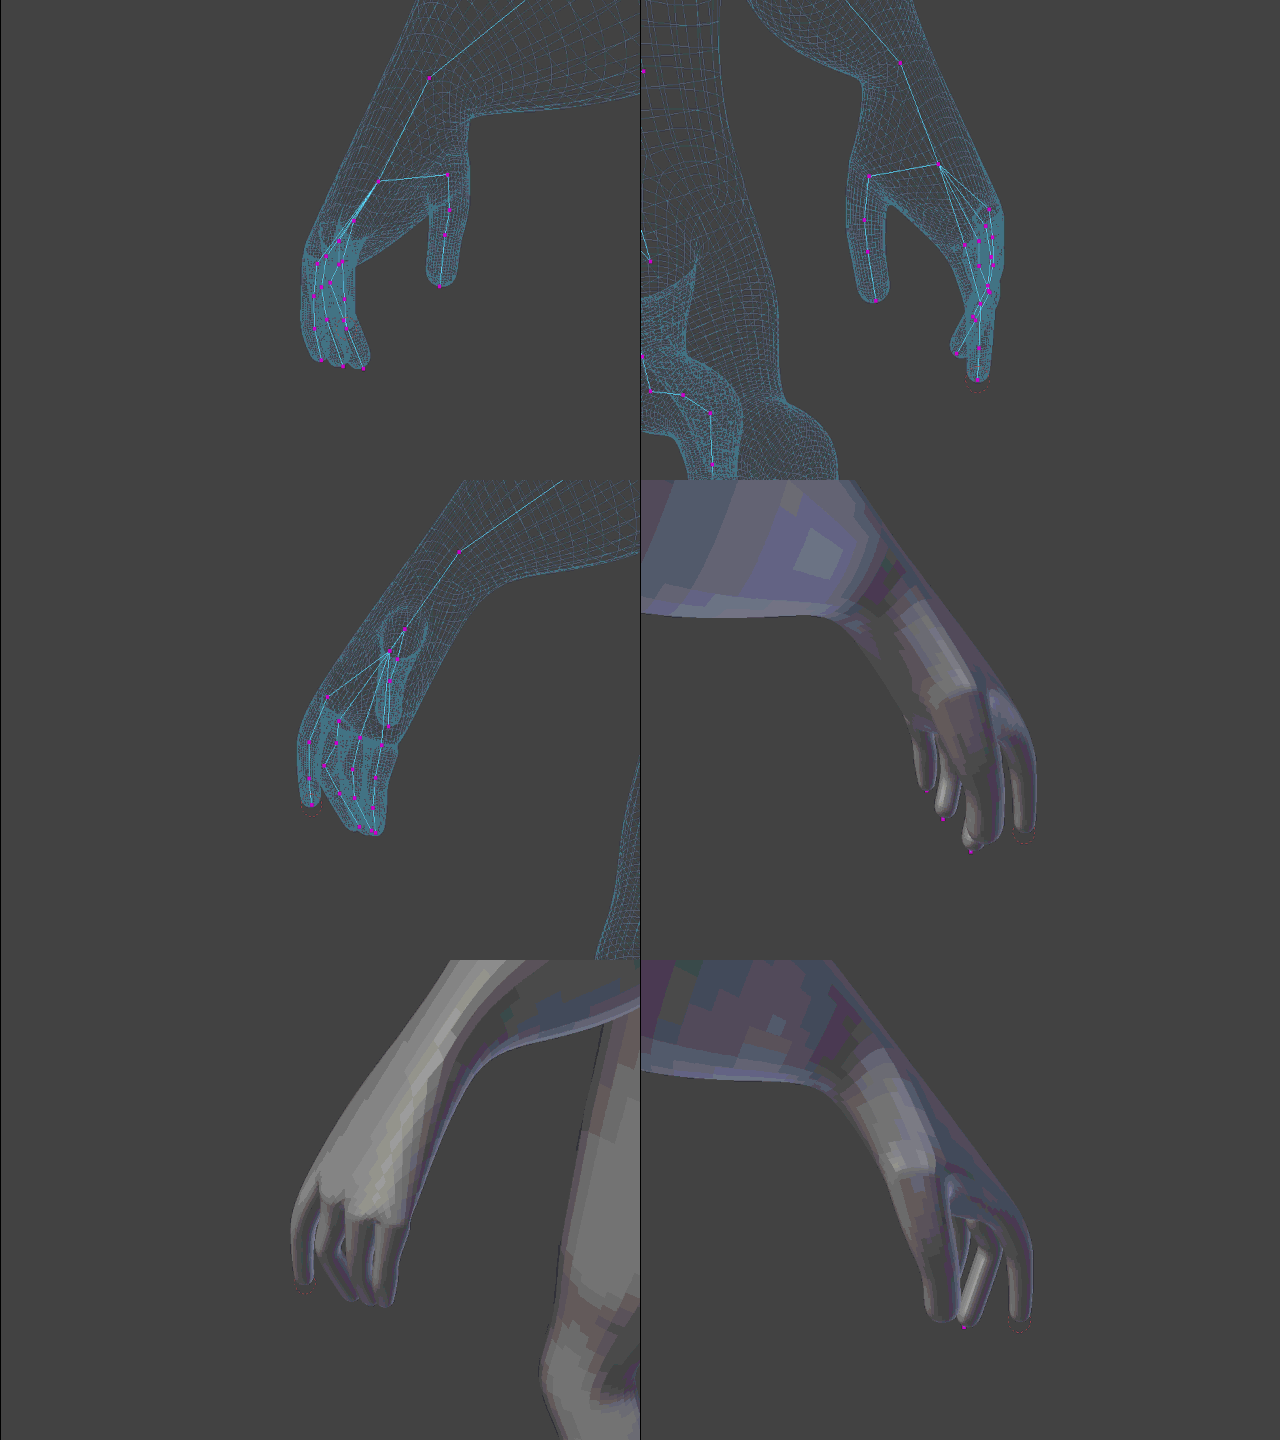
- Base mesh completed
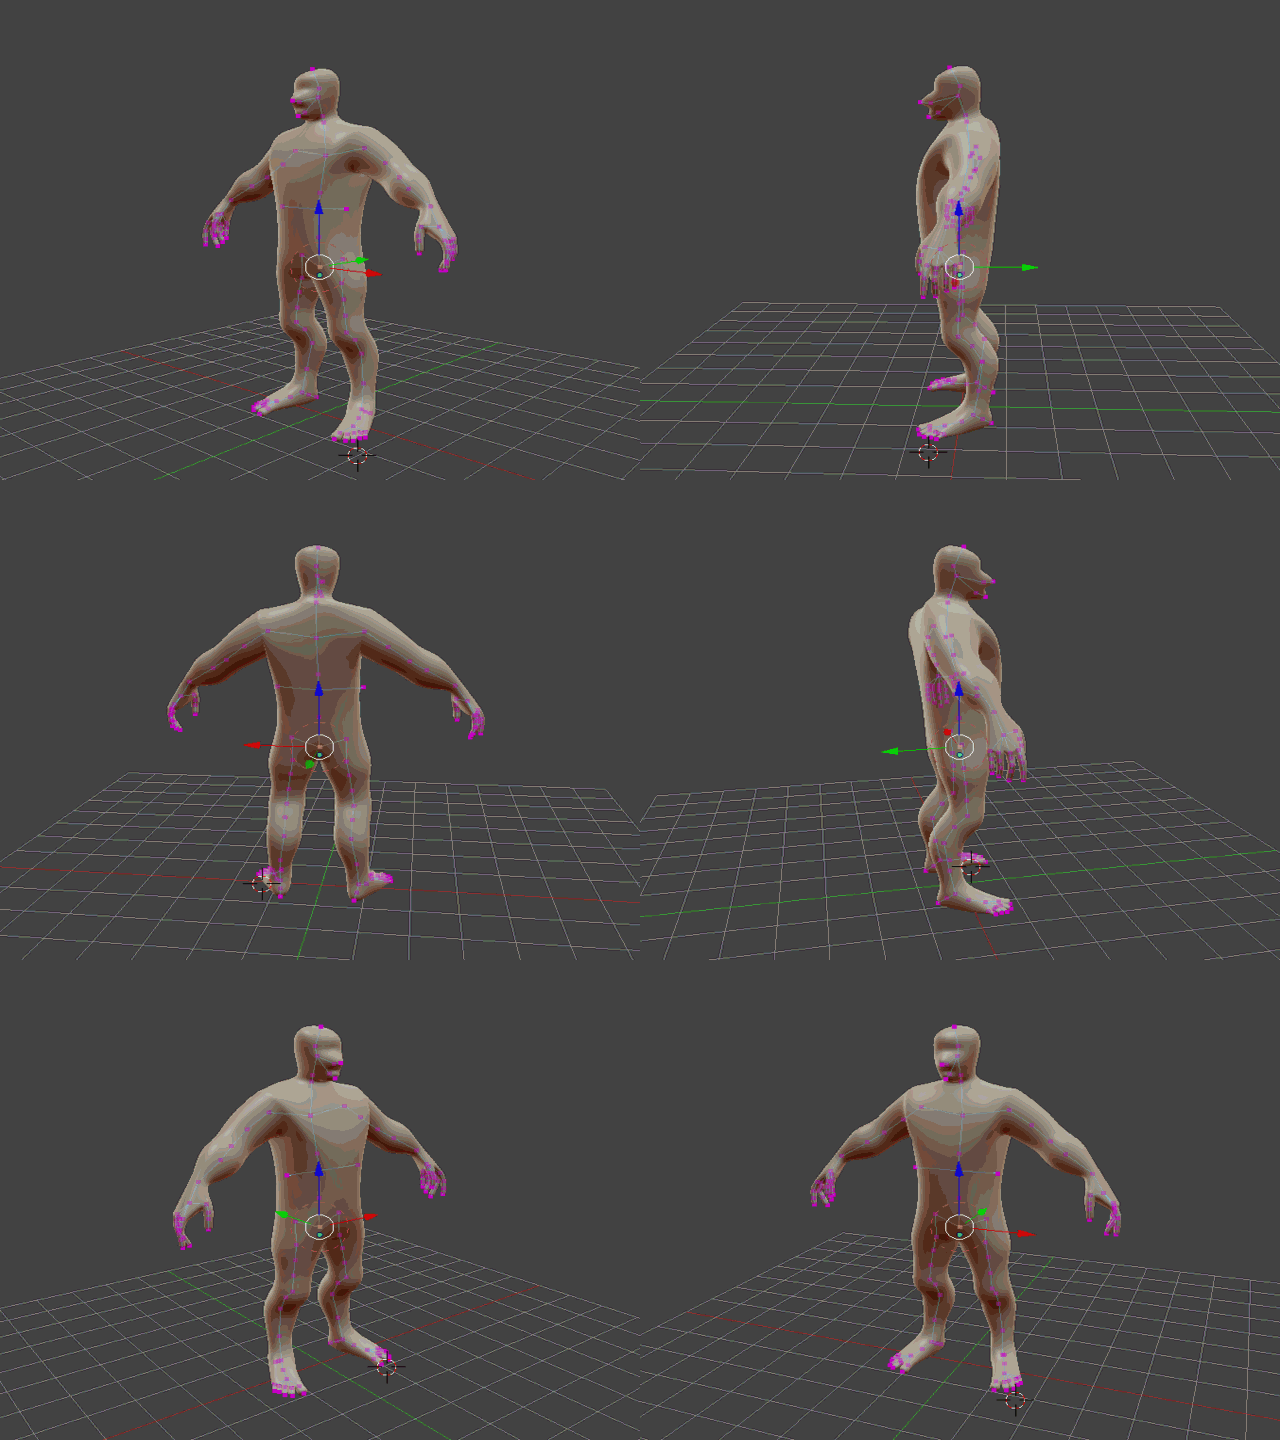
- From here we could use the sculpt tools to refine the character and then retopologize the mesh once we are happy.
- Clay Brush / Area Plane
- Dyntopo Enabled / + Subdivide Edges / + Brush Detail

- Ogre type creature created from the base mesh using the above brush settings

Blender is a much loved, free and open source 3D application with a thriving user community. It was originally created by Ton Roosendaal as an in house software tool at NeoGeo - an animation studio he co-founded. It was later released as free creation tool.
Visit:
Open Project Films created by the Blender foundation:
Sunday, 24 September 2017
Notes - Nodes & Mash – Maya
Here are some learning notes on creating a plug-in for Maya, creating relationships with expressions and Maya's new python node. These are notes for me but perhaps others may stumble upon them and find them to be of interest. I'll probably change and grow this page as I learn a little more.


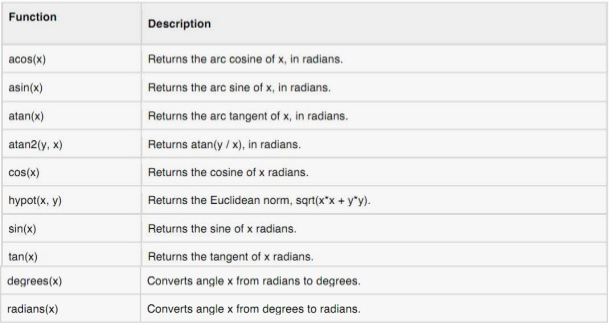
2. Some links to various resources:
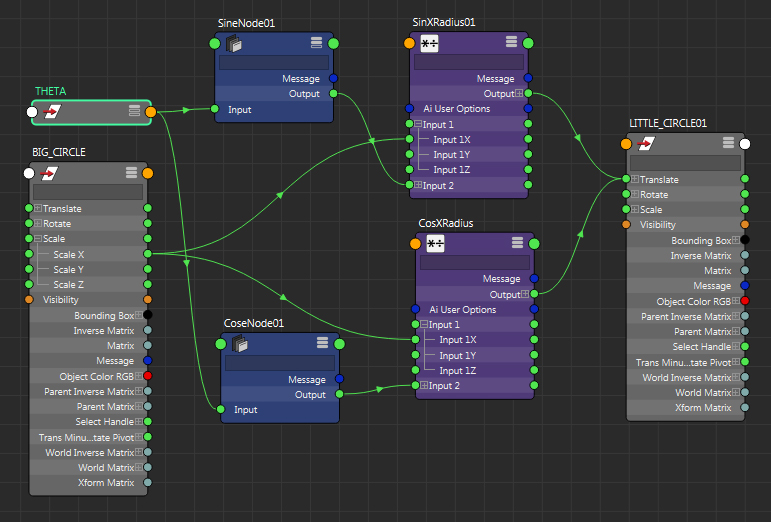
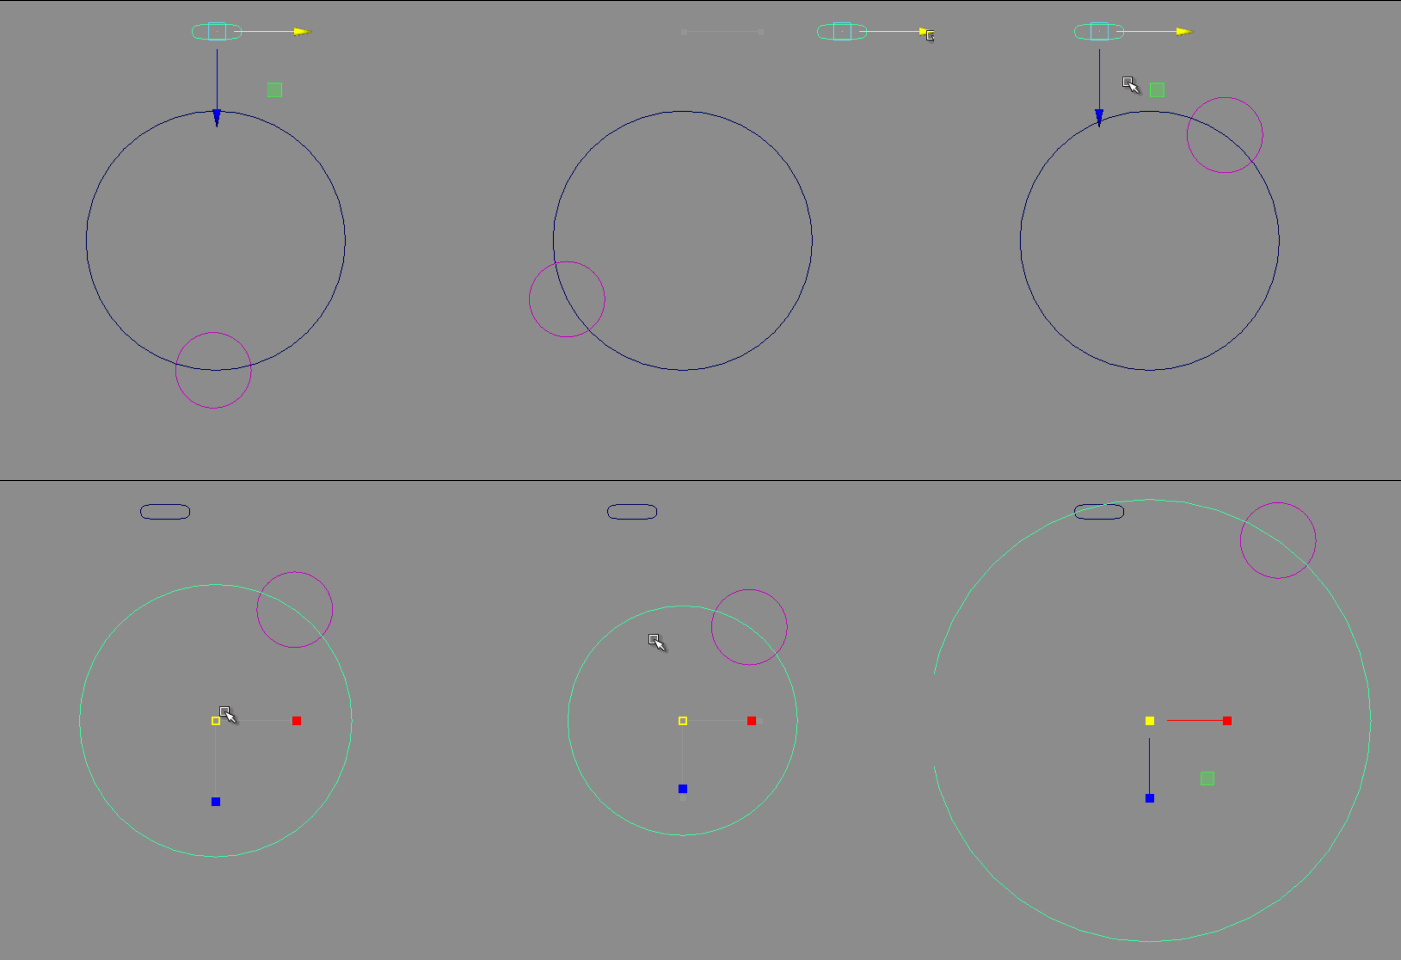 3. A Mel expression that does the exact same thing. A little bit less work :)
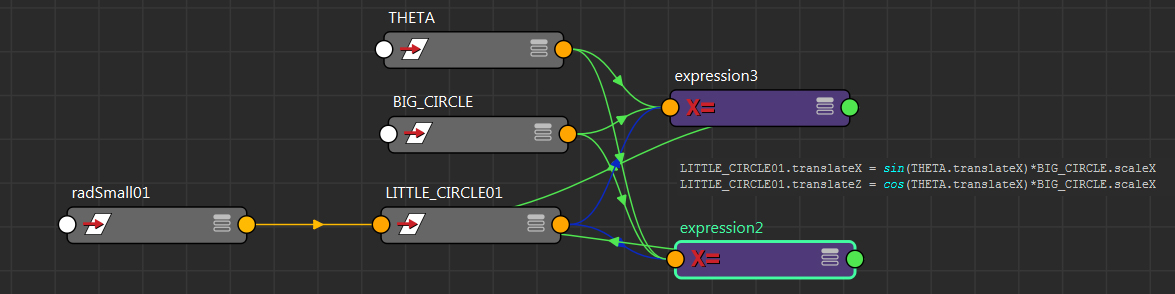 Two very simple expressions that create tangent circles (also known as kissing circles).
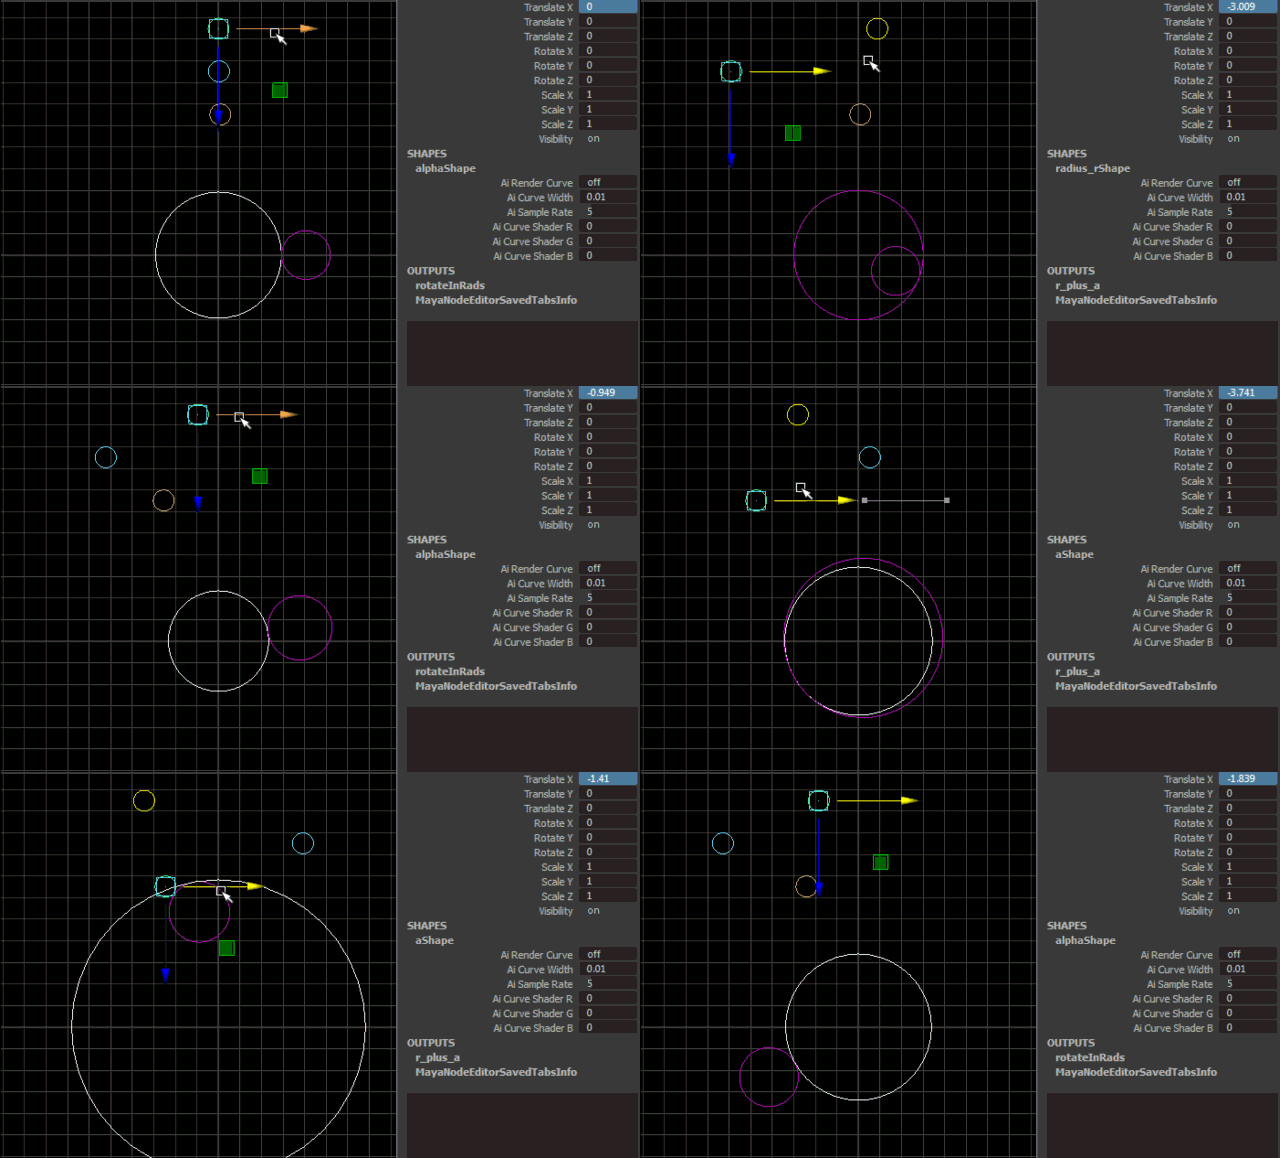
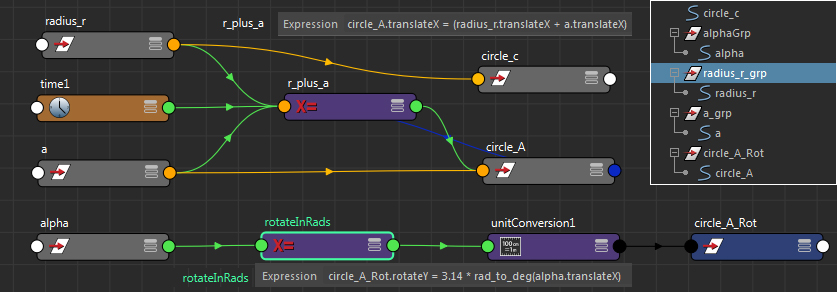 Nodes and expressions can build almost any kind of relationship we want.
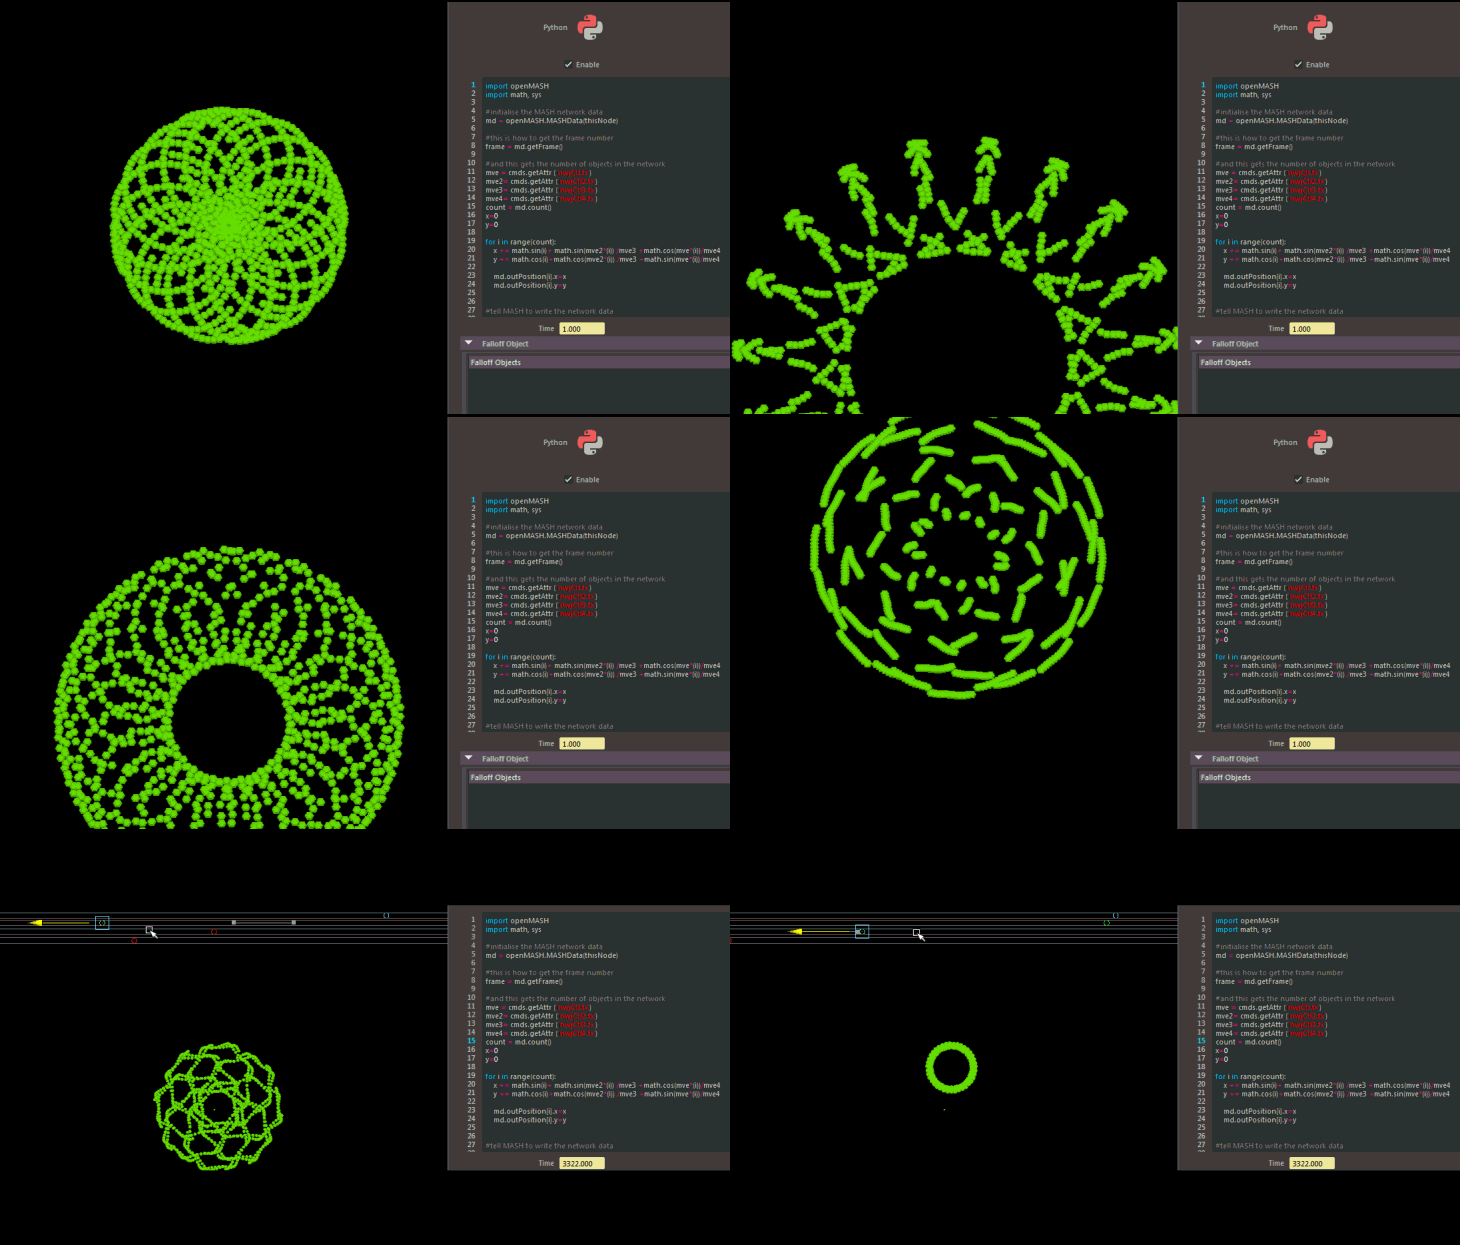
4. Mash Python node (Maya)
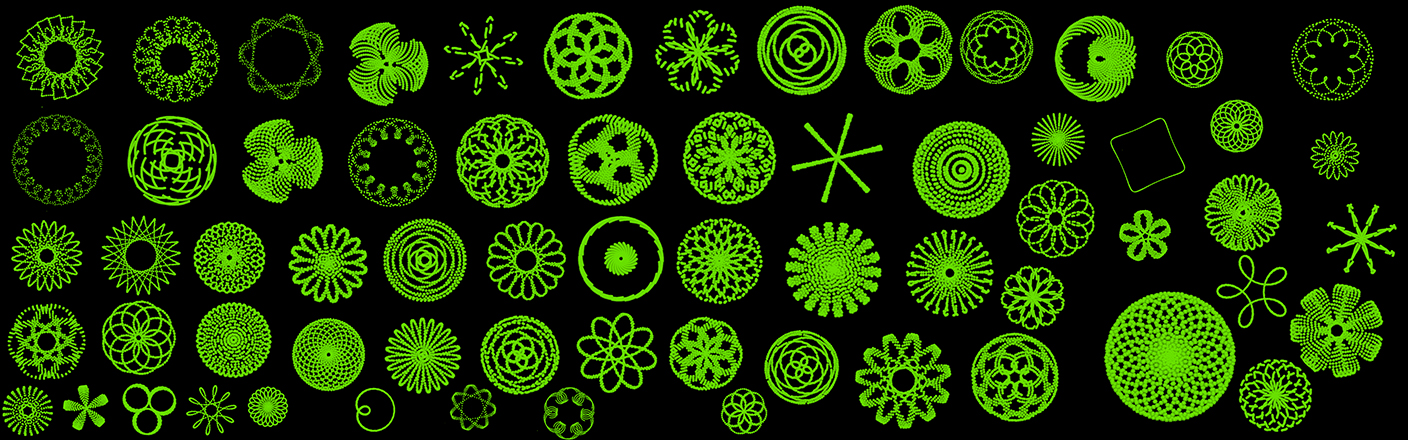
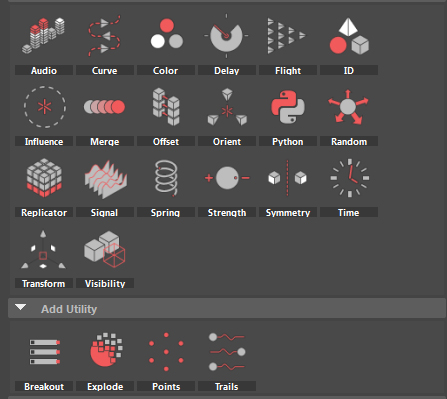 Python Node Test with controllers piped in as variables - Expression: (cos(t) + cos(6t)/2 + sin(14t)/3, sin(t) + sin(6t)/2 + cos(14t)/3) - (see article "Creating Art with Mathematics"). Perhaps usful patterns for stone placement or tiles of some sort.



- Notes and links on how to create a Maya plug-in
- API module: import maya.openMaya
- Proxy class access: import maya.openMayaMPx
- Access to math module: import math
- Variable for node name: kPluginNodeTypeName = "nodeNameNode"
- ID number for Node: nodeNameNodeId = OpenMaya.MTypeId(0x00001)
- Define subclass of existing class: class nodeName(OpenMayaMPx.MPxNode)
- input = OpenMaya.MObject()
- output = OpenMaya.MObject()
- Override constructor using base: OpenMayaMPx.MPxNode.__init__(self)
- plug = current input: def compute(self,plug,dataBlock):
- Compute math example: result = math.sin( inputFloat )
- Recompute plug and flag as clean: dataBlock.setClean( plug )
- Maya pointer: return OpenMayaMPx.asMPxPtr( sineNode() )
- Initialize method - input and output: nodeInitializer():
- Add attribute here (ex- frequency or or amplitude): input = nAttr.create( "input", "in", ####)
- Causes compute method to re-calculate - sets relationship: sineNode.attributeAffects( sineNode.input, sineNode.output )
- Plug-in registration - Node Name/ID/Create Method/Initialize Method/Node Type: mplugin.registerNode( kPluginNodeTypeName, sineNodeId, nodeCreator, nodeInitializer )
- De-register plug-in: mplugin.deregisterNode( sineNodeId)
2. Some links to various resources:
- Creating a simple Maya node with python - Three render Monkeys
- Python Scripting for Maya artists 2.0 - Chad Vernon
- The Maya Autodesk Help Documentation
- Autodesk uses the "Simplified Wrapper and Interface Generator (SWIG) to create
- bindings between c++ and Python" - see: Practical Maya Programming with Python
- Complete Maya Programming - Book by David. A. D. Gould
- How did Python become a Data Science Powerhouse?
- Wrappers - math classes - m -(Quaternion, matrix, vector, points, vectors etc)
- MObjects - data encapsulation (meshes, skin clustter nodes, curves etc).
- Functions Sets - mfn - (access and manipulate data)
- Proxy Class - mpx - - (abstractions - create new object types - inheritance)
- Createing your first Maya Plug-in in Visual Studio
- A unified approach to compiling and maintaining Maya plug-ins across all platforms - in CMAKE
4. Mash Python node (Maya)
Wednesday, 20 September 2017
Instancing test using Maya's Mash + Vray
This is a test for instancing grass with Mash in Maya. Very simple. Very quick. The settings are low and the render took next to no time. Perfect for previewing.

Oh how I am going to love using mash... and it has a python node!
I recently delved into writing some math nodes for Maya with python, (and compiling them in c++), with the idea of building something like what Rhino has with Grasshopper. It's turning into an excellent learning exercise. However, mash already has a lot of what I always wanted Maya to have. So... fun times ahead.
To test out some instancing using Maya's Mash:
1. Paint Effect for grass - converted to polygon quads;

4. In mash I instanced the grass over a plane and created a falloff object to mute the grass around the skull within a strength node. I also added a random node to the mix.
There is so much artistic control with this kind of procedural approach. Change, add, swap, blend, randomize, mute, duplicate etc.

Oh how I am going to love using mash... and it has a python node!
I recently delved into writing some math nodes for Maya with python, (and compiling them in c++), with the idea of building something like what Rhino has with Grasshopper. It's turning into an excellent learning exercise. However, mash already has a lot of what I always wanted Maya to have. So... fun times ahead.
To test out some instancing using Maya's Mash:
1. Paint Effect for grass - converted to polygon quads;

2. UV's organized 3X3. Vray 2 sided shader applied:


3. I thought I would throw in an old skull I poly modeled a long time ago. I decimated it in Zbrush, instead of using a displacement, and gave it a Vrays SSS shader. Here is a time-lapse of the Maya session:
4. In mash I instanced the grass over a plane and created a falloff object to mute the grass around the skull within a strength node. I also added a random node to the mix.
There is so much artistic control with this kind of procedural approach. Change, add, swap, blend, randomize, mute, duplicate etc.

Subscribe to:
Posts (Atom)