

Click HERE for an older interview with Ton Roosendaal. It gives some history and context to blender.
Note: Page last added to on 18/10/17
Hotkeys:
Navigation:
- MMB = Orbit
- Ctl + shift + Middle Click /or/ Scroll Wheel = Zoom
- Shift + F5 = Viewport
- 0(numPad) = Camera Mode (Enter/Exit)
- 5 = Orthographic Perspective
- 1/3/7(numPad) = Front/Right/Top View
- Ctl + 1/3/7(numPad) = Back/Left/Bottom
- Home = Frame All
- .(numPad) = Frame Selection
- Shift + C = Reset Viewport
- Shift + F = Video Game Navigation
- /(numPad = Frame Selection
- Z = Wireframe
- Alt + Z = Toggle Texture/Shader
- Shift + Z = Toggle rendered/Shaded
- (Shift + B + release) + Drag = Zoom into Portion
- Shift + A = Add Objects
- Ctl + Tab = Switch Edge/Vertex/Face panel
- Tab = Edit Object Mode
- Left Click = Move 3D Cursor
- Ctl + A = Apply objects transformations (like freeze trans)
- Y = Edge Split
- Ctl + 1/2/3/0 = Subdivision Amount
- Ctl + # = Add Subdivisions
- U = UV uwrap
- K = Knife Tool
- I = Inset
- E = Extrude
- Alt + M = Merge Vertices (options panel ex: merge to centre)
- Ctl + R = Loop Cut(Scroll wheel to add loops - pre right click)
- Ctl + J = Join Objects
- Ctl + B =Bevel (scroll for subdivs)
- G + G = Slide Vert/Edge/Face
- V = Rip
- Alt + V = Duplicate Edge Loop on Object
- F = Fill/Bridge Edges/Verts
- P = Separate Selected (Verts/Face/Edge)
- G + O = Offset and slide vert across edge
- D = Draw Tool
- Click + Drag = Add
- Shift + Click + Drag = Subtract
- F + Drag = Brush Radius
- Shift + F + Drag = Brush Strength
- C = Clay Brush
- 2 = Clay Brush
- G = Grab Brush
- 7 = Grab Brush
- I = Inflate/Deflate Brush
- 8 = Inflate/Deflate
- Shift+5 = SculptDraw
- Shift+6 = Smooth
- S = Smooth Brush
- Shift+C = Crease Brush
- L = Layer Brush
- 9 = Layer Brush
- M = Mask Painting
- 0 = Mask
- K = Snake Hook Brush
- Shift+T = Flatten/Contrast Brush
- P = Pinch/Magnify Brush
- 1 = Blob Brush
- 3 = Clay Strips Brush
- 4 = Crease Brush
- 5 = Fill/Deepen
- 6 = Flatten/Contrast Brush
- Shift+1 = Nudge Brush
- Shift+2 = Pinch/Magnify Brush
- Shift+3 = Rotate
- Shift+4 = Scrape/Peaks
- Shift+7 = Snake Hook
- Shift+8 = Thumb
Moving Objects:
- G = Move (+ X/Y/Z to Constrain)
- S = Scale (+ X/Y/Z to Constrain)
- R = Rotate (+ X/Y/Z to Constrain)
- G + 5 = Move 5 Units
- R + 2 = Rotate 2 Units
- W = Panel (select Bridge)
- Shift + C = Cursor at 000 (plus frame focus)
- A = Select/Deselect All
- B(release) + Drag = Box Selection
- B(release) + Drag + Shift = Box Deselect
- B(release) + Left Click(drag) = Rectangle Select(add)
- B(release) + Middle Click(drag) = Rectangle Select(Remove)
- C + Left Click = Circle Selection(add) - (+ Scroll for Circle Radius change)
- C(release) + Shift = Circle Selection(remove) - (+ Scroll for Circle Radius change)
- Ctl + Left Click - Lasso Selection(add)
- Ctl + Shift + Left Click - Lasso Selection(add)
- Alt + Right Click = Select Edge Loop
- Ctl + Alt + Right Click = Select Edge Ring
- L = Select shared Verts/Edges/Faces
- Ctl + +(numPad) / -(numPad) = Grow/Shrink Selection
- H = Hide
- Shift + H = Hide Unselected
- Alt + H = Unhide
- X = Delete Panel
- Shift + D = Duplicate
- Alt + Shift + D = Duplicate
- Ctl + Alt + Z = Undo History Panel
- Shift + S = Snap Cursor to Selection
- Ctl + Shift + Alt + C = Set Origin (Geo to Origin/Origin to 3D cursor etc)
- Shift + S = Cursor options (ex: Cursor to center)
- Alt + A = Play/Pause
- Shift + Alt + A = Play in Reverse
- Left/Right Arrows = Next/Previous Frame
- shift Left/Right Arrows = Beginning/End of Timeline
- Shift + Up/Down Arrows = Jump Forward/Back 10 Frames
- Shift + Spacebar = Window Focus
- Ctl + Ring Arrow = Scroll through window setups
- Shift F4 = Python Console
- Shift + F10 = UV Unwrap Window
- F10 = Image Window
- Shift + F7 = Editing Window (modifiers etc)
- N = Transform Window Toggle
- T = Tool Bar Toggle
- Ctl + I = Invert Selection
- Shift + F9 = Outliner
- Shift + F3 = Node Editor
- Shift + F11 = Text Editor
- Shift + F7 = Properties Editor
- Shift + F2 = Logic Editor
- Ctl + .(NumPad) = Object Focus
- Spacebar = Search Menu
- M = Move object to Layer Panel
- 1/2/3/4 etc = Layer number

Hotkeys added:
- Ctl + ` = Smooth Shade
I'm used to the way the Maya Viewport looks so I installed the following "Maya Lover" Theme from Here. It's just cosmetic but I like it.
Modeling Practice - Ant (I'll document my first modeling attempt in blender)
- Shift + S to center the cursor via the panel
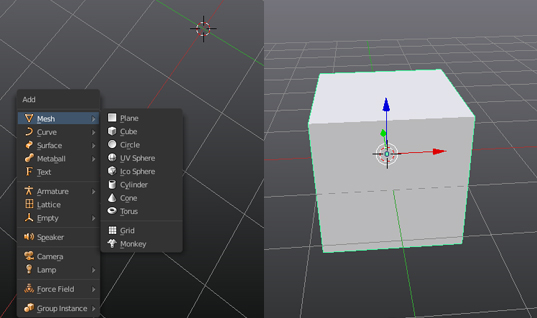
- Shift + A to add - mesh - cube
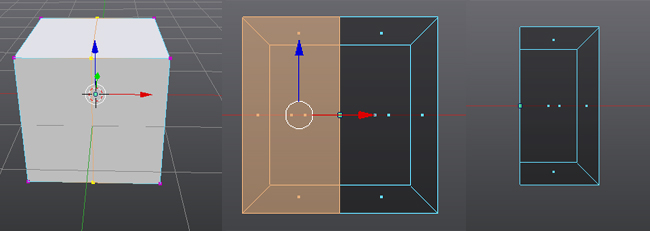
- Ctl + R to place a loop cut through the center of the object
- Z to make the object transparent (so we can select the back faces)
- 1(numpad) to switch to front view
- B + Release + drag for rectangular selection of left side faces
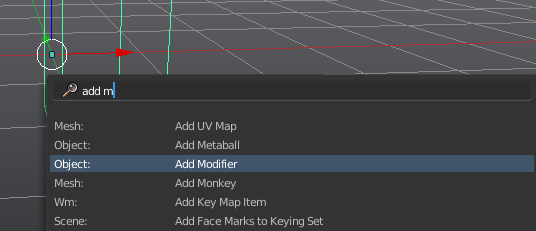
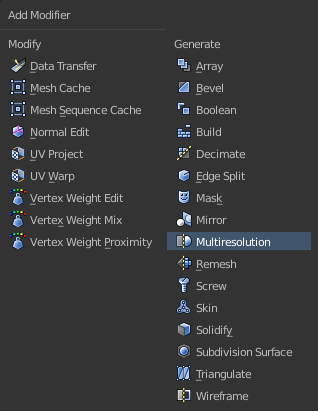
- Spacebar - "type add m" bring up the add modifier panel
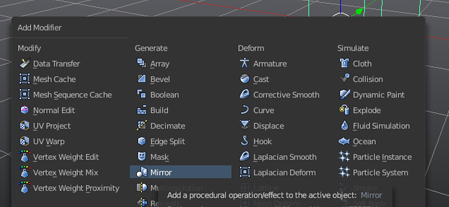
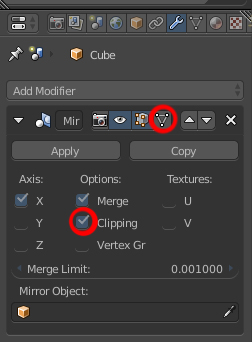
- Add mirror modifier
- To constrain the central verts to the Y and Z axis we need to enable "clipping":
- To see the mirrored mesh we need to turn on "cage to modified result":
- Show the back facing verts so we can select them
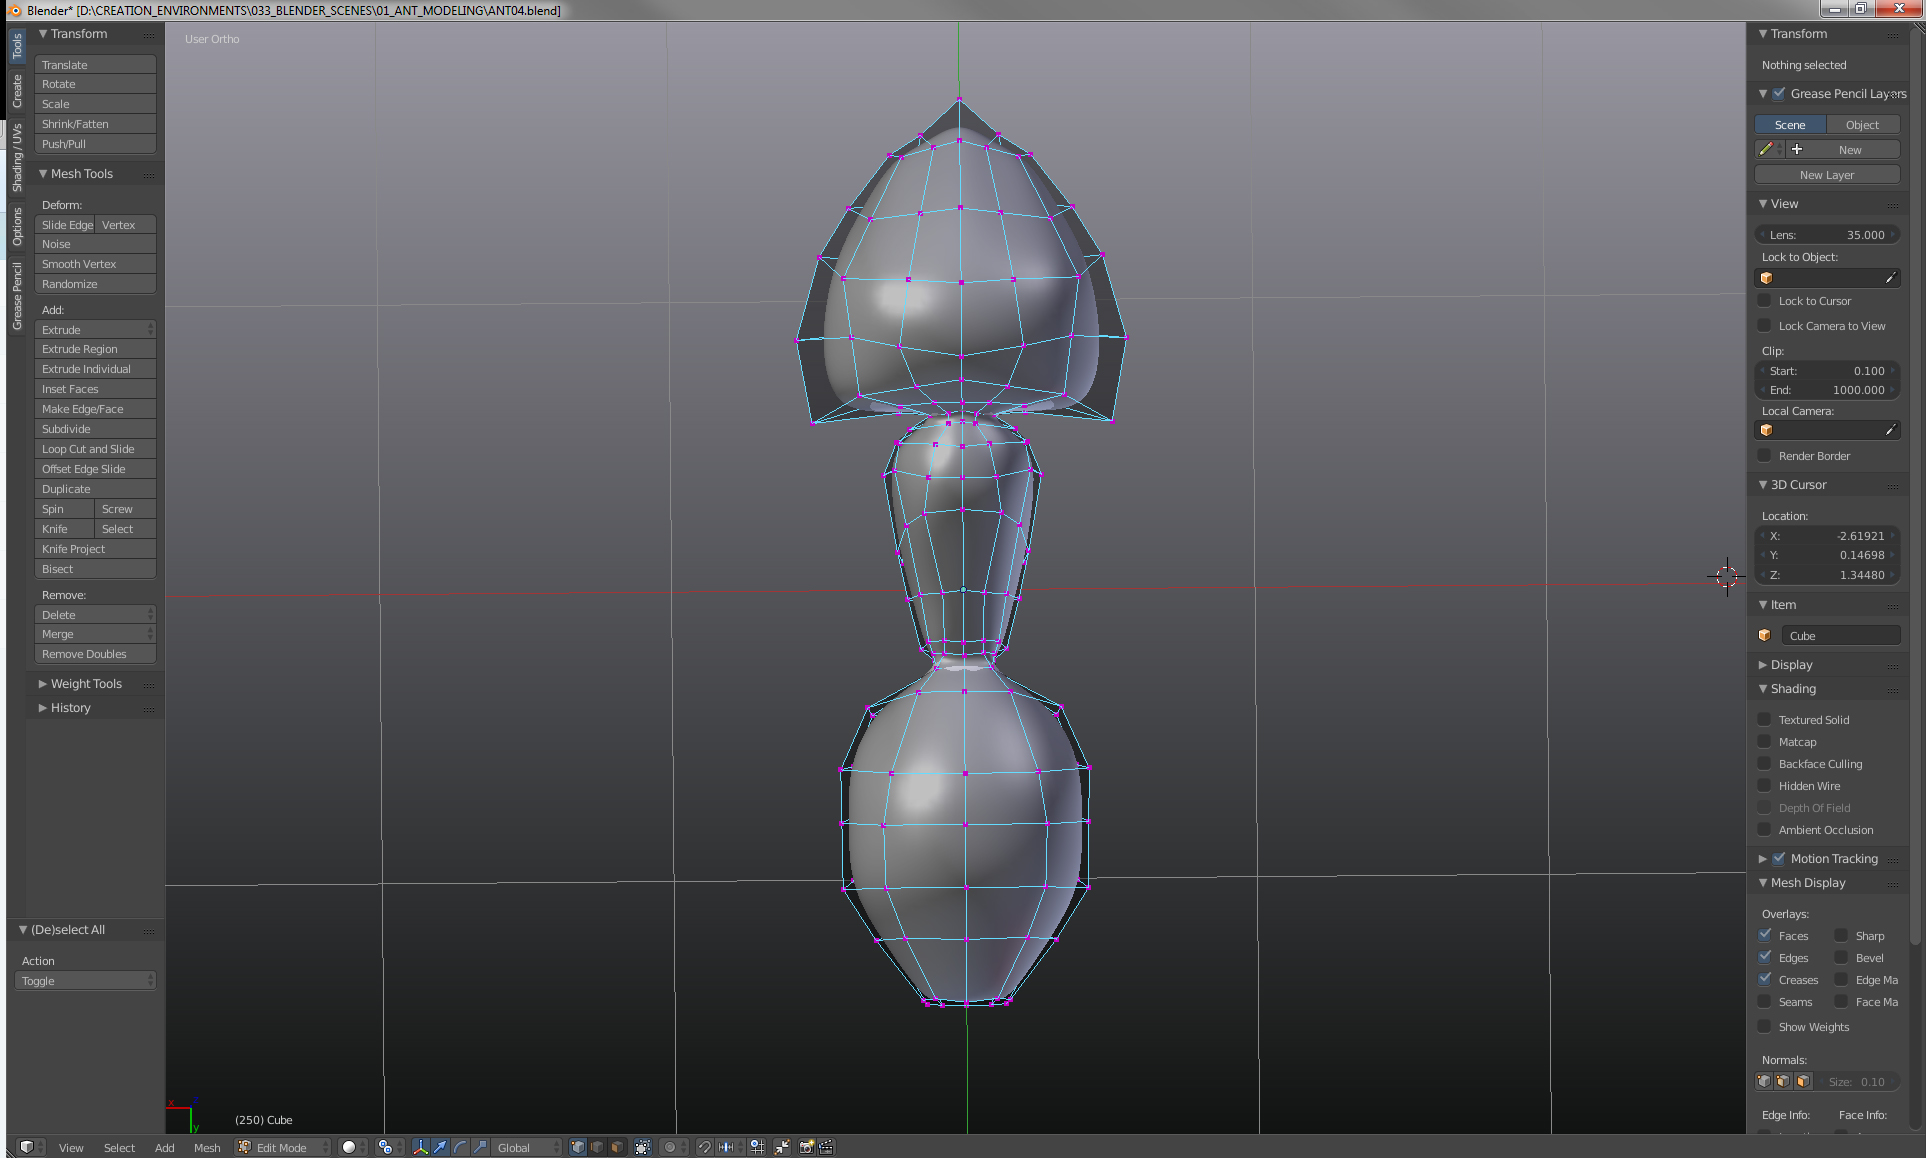
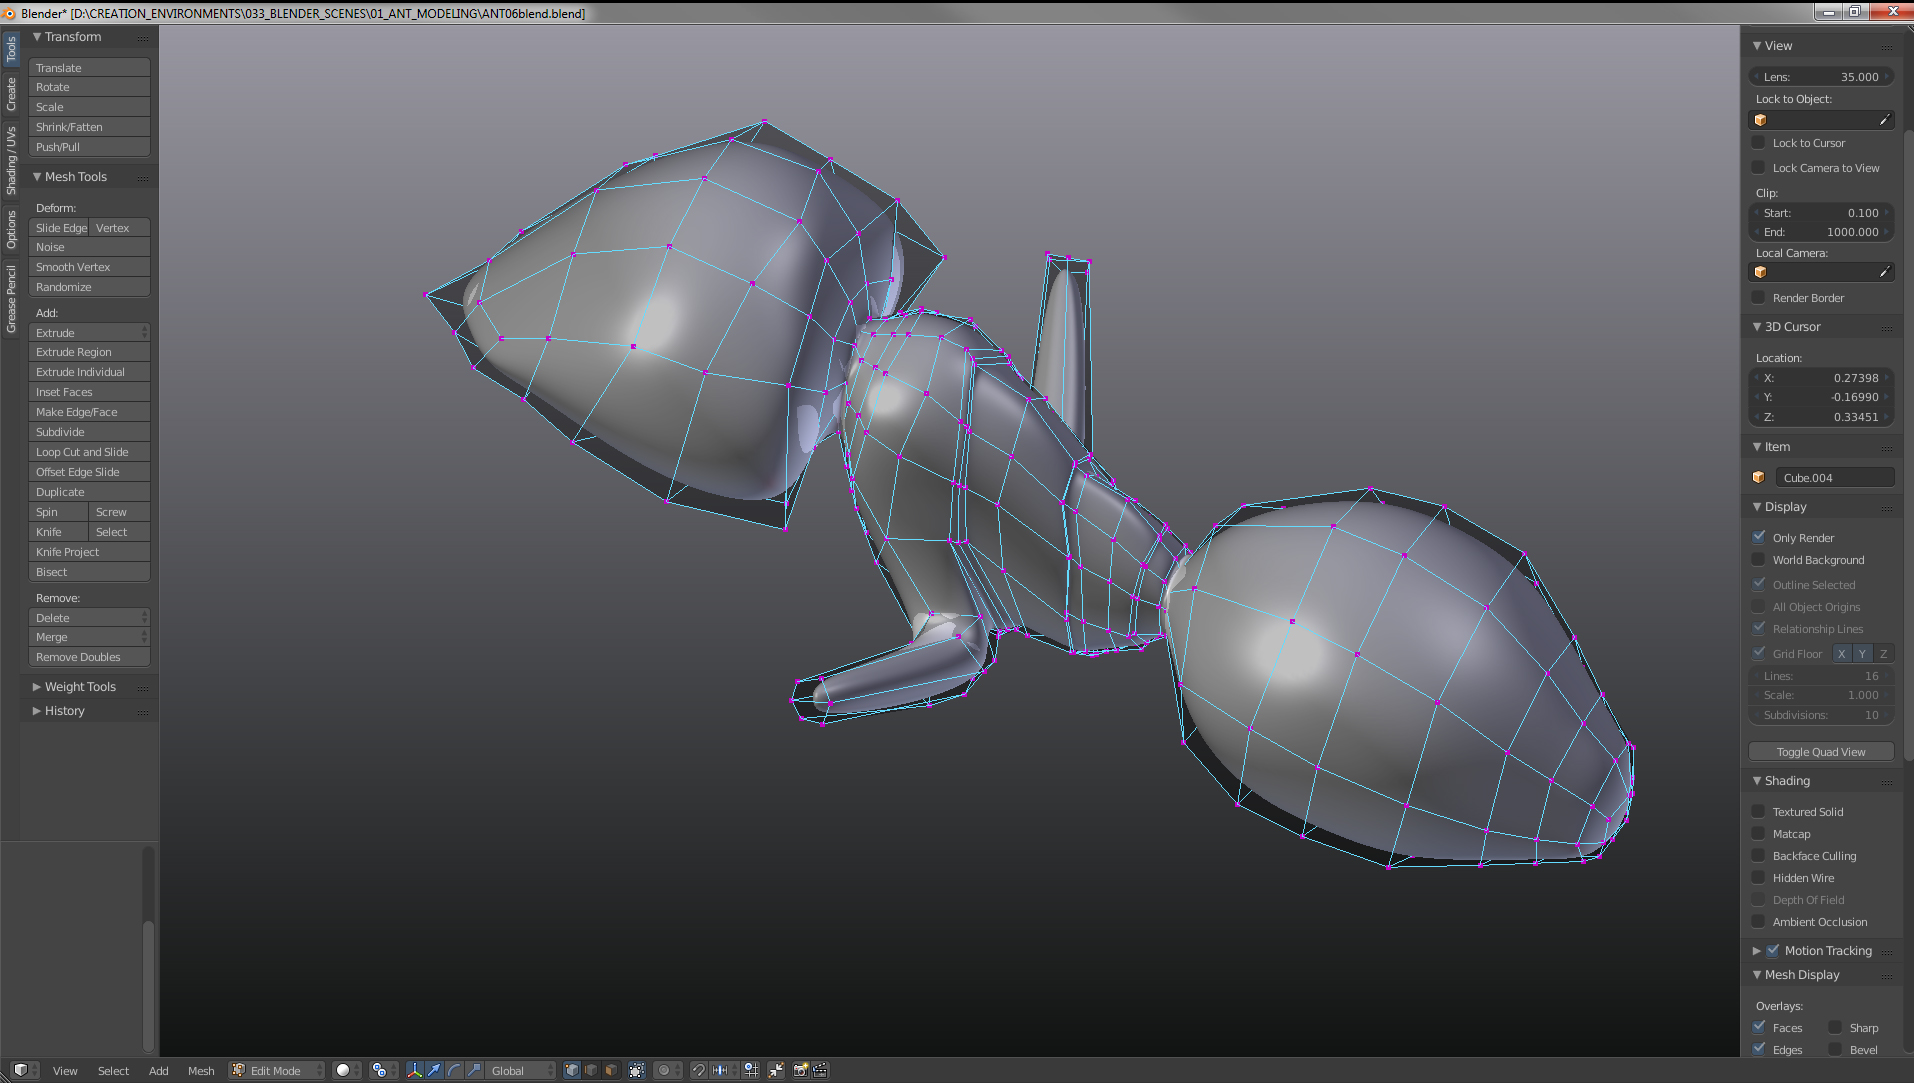
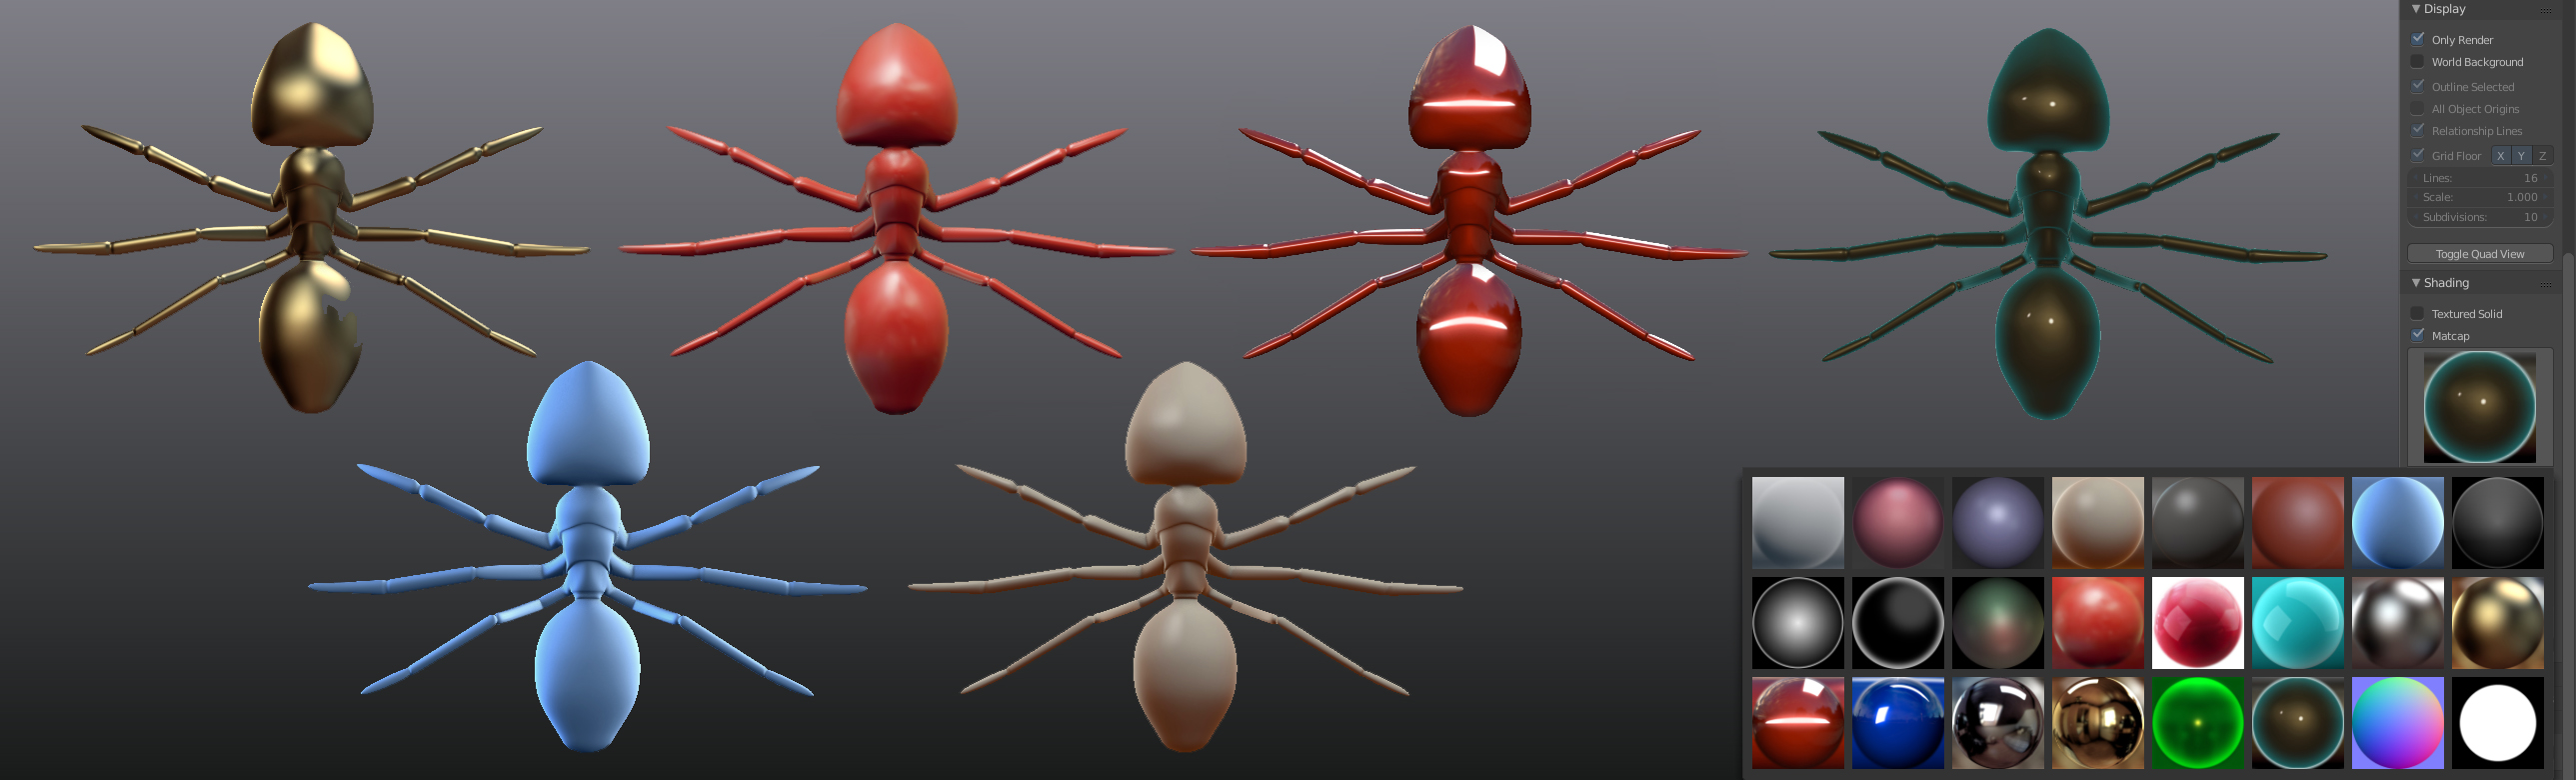
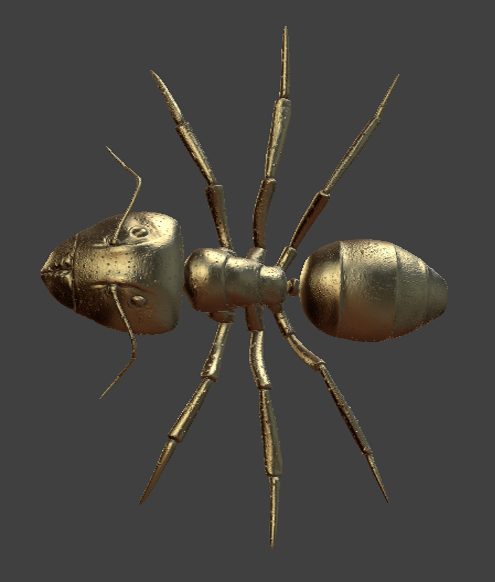
- Base mesh for the head, abdomen and thorax.
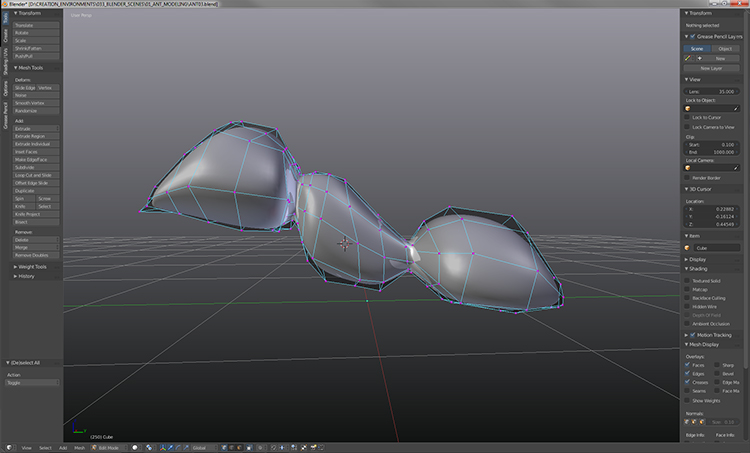
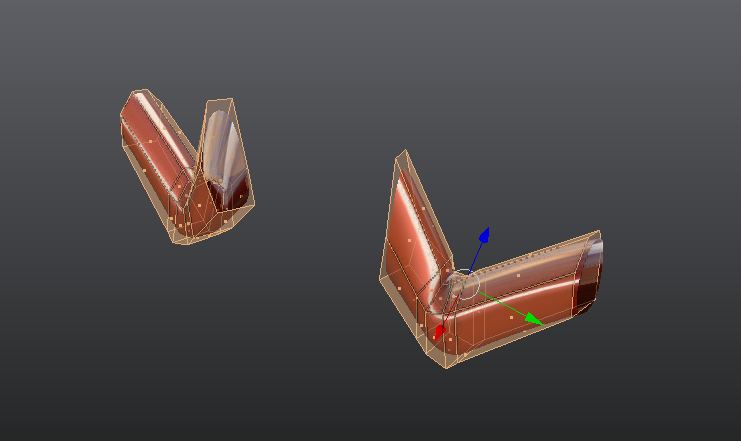
- Extruding some legs
- Within the transforms window(N) / display / Shading there are a number of Metcap shaders which are excellent for picking up surface imperfections while modeling.
- Subdivisions with cage
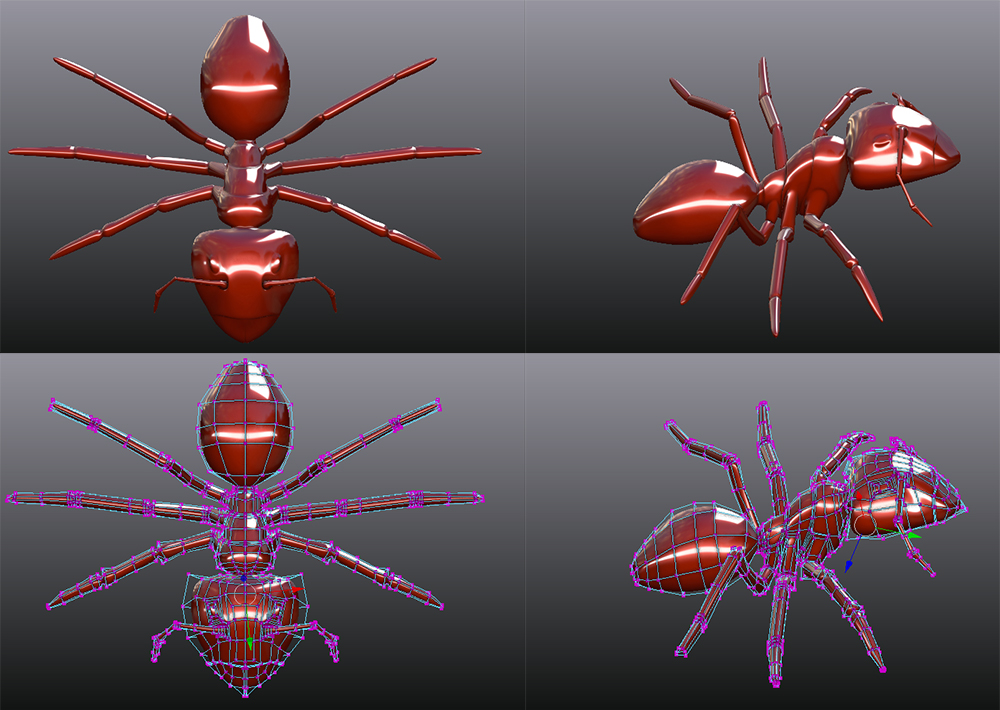
- To isolate an area for modeling the details we select the faces we want to isolate and Shift + H.
- A little more tweaking
---------------------------------------------------------------------------------------------------------------
Testing Out the Sculpt Brush
- Before starting to sculpt - Apply Mirror Modifier and delete Subsurface Modifier if we are starting from a model created with the above method

- Spacebar + "add m" to add modifier Multiresolution
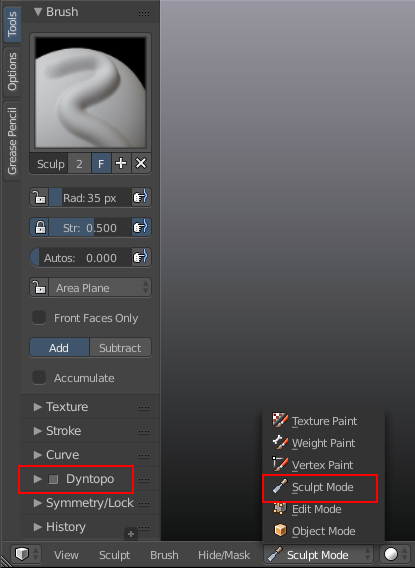
- Switch to sculpt mode
- For roughing in a sculpt we can switch to Dyntopo
- Choose Brush and start sculpting
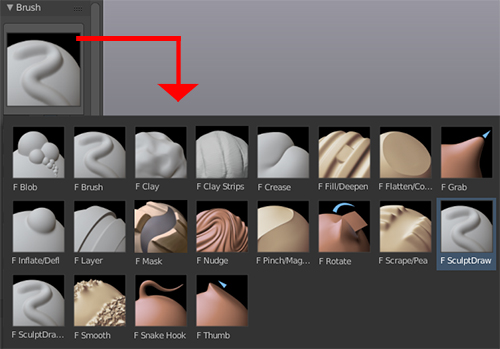
- Hotkeys of Note: F = Brush Radius Shift F = Brush Strength
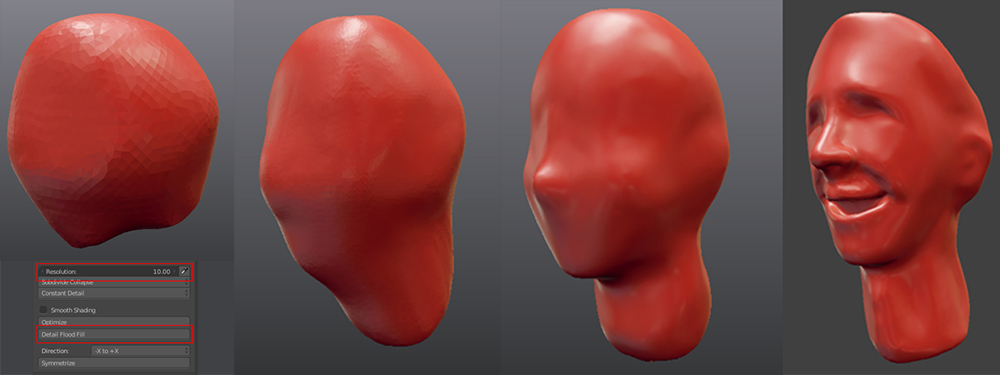
- Sculpting from a poly UV Sphere, (in Dyntopo mode), allows us to sculpt in a similar way to zbrush - as we would in real life with clay.
Once we are happy with a Dyntopo sculpt we can retopologize the mesh in one of two ways:
- The easy way is to buy a script like "RetopoFlow" which appears to be similar to Maya's quad draw tools.
- The second/free way is explained HERE by Zacharias Reinhardt.

- Create plane with cursor at 000.
- Ctl + R to slice in half / delete Left Side
- Add Mirror modifier / enable clipping
- Add Subsurf modifier / set as simple (not Catmull-clark)
- Add a Shrink Wrap modifier / choose target mesh / set the offest to .002 / enable "keep above surface" / make sure the triangle icon is enbled so that we see the Verts.
- To avoid selecting verts on the other side - (alt + b = Clipping border) - (alt + b to remove clipping border).
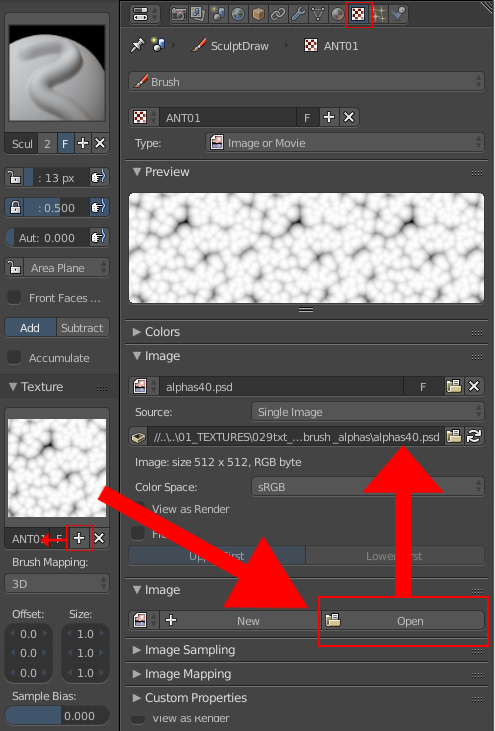
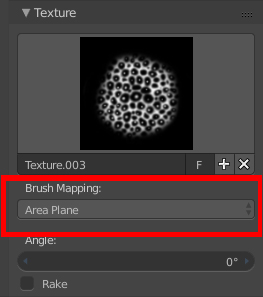
- choose brush mapping style
- We can use a stencil - (note hotkeys: RMB = move stencil / shift + RMB = Scale Stencil / Ctl + RMB = Rotate stencil)
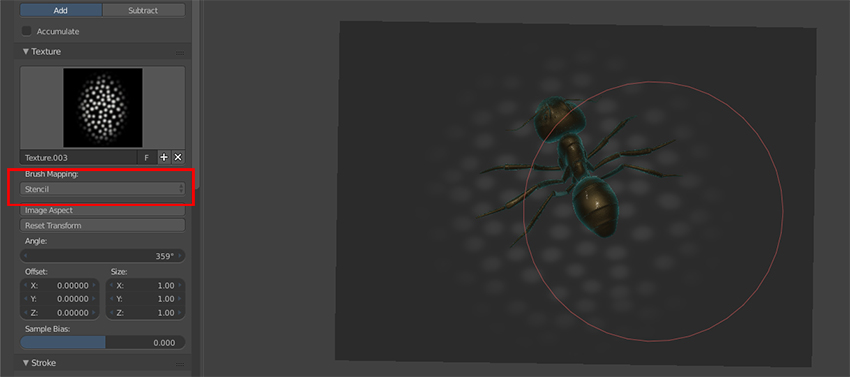
- Some details added to the mesh with alpha brushes
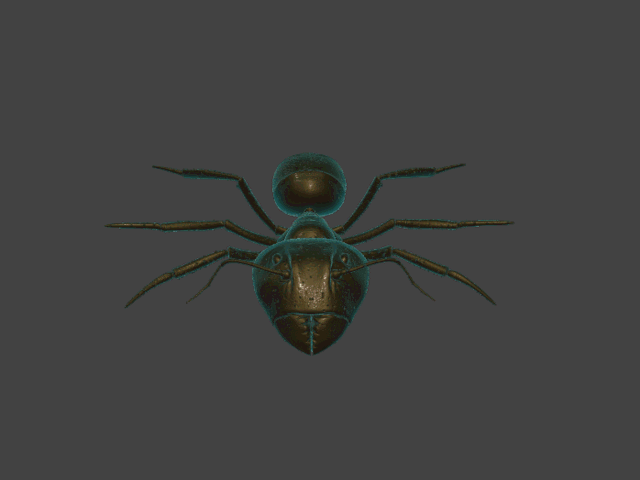
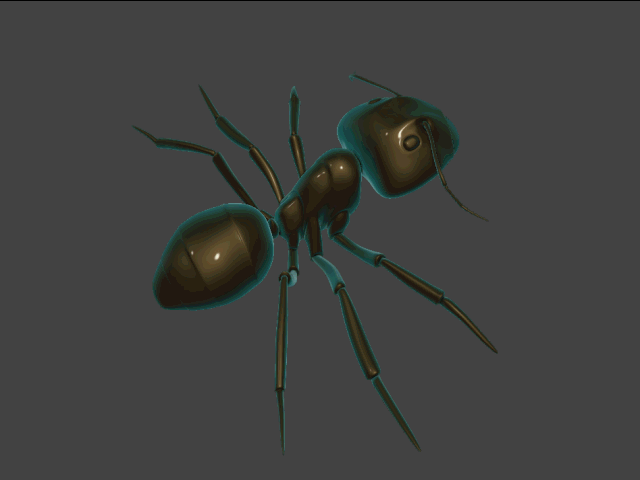
- With a shiny gold met material we can see more details
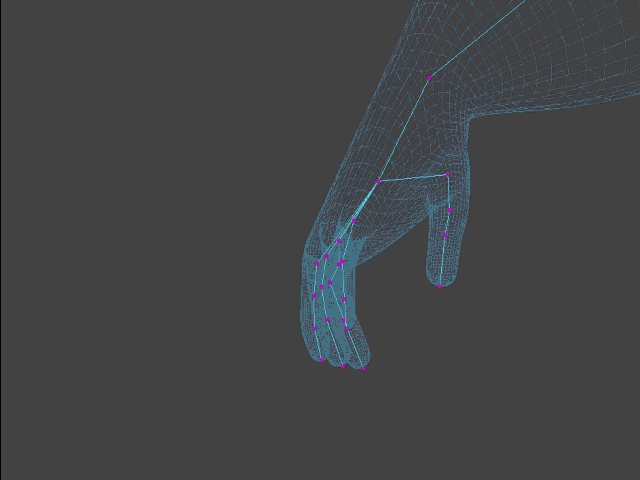
Modeling with Blender's Skin Modifier
Setup:
- Create plain(shift + C to center Pivot) / Alt + M / Merge at center / Edit Mode / Spacebar/"Add Modifier"/ Mirror/Skin/SubDiv
- Extrude + G + Move / Ctl + A(x,y,z) for Scale / Ctl + R = Add Vert
- Starting with Torso and Feet - a little bit tricky
- Attempt at constructing the hand
- Base mesh completed
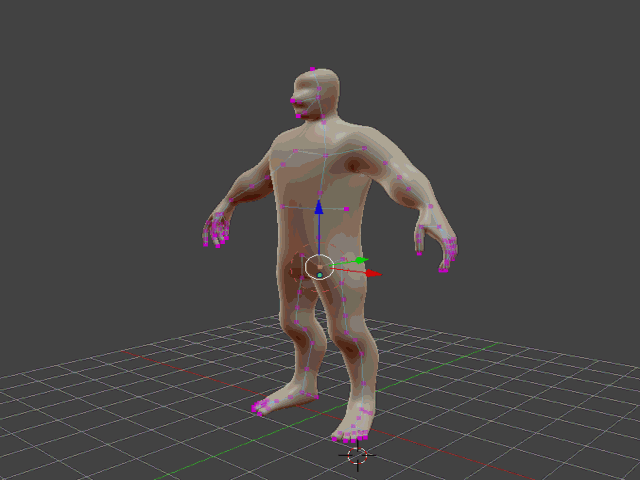
- From here we could use the sculpt tools to refine the character and then retopologize the mesh once we are happy.
- Clay Brush / Area Plane
- Dyntopo Enabled / + Subdivide Edges / + Brush Detail

- Ogre type creature created from the base mesh using the above brush settings

Blender is a much loved, free and open source 3D application with a thriving user community. It was originally created by Ton Roosendaal as an in house software tool at NeoGeo - an animation studio he co-founded. It was later released as free creation tool.
Visit:
Open Project Films created by the Blender foundation: